 When it comes to maintaining your HP printer, ensuring optimal performance is key. A well-functioning printer not only saves you time and frustration but also produces high-quality prints. One crucial component of your printer that plays a vital role in its performance is the printer rollers. These small but mighty rollers help feed paper smoothly through the printer, ensuring accurate print alignment and preventing paper jams. In this article, we will guide you through the process of cleaning your HP printer rollers, so you can enjoy improved printing results.
Understanding HP Printer Rollers
Before diving into the cleaning process, it’s important to understand the different types of rollers found in an HP printer and their functions. HP printers typically have three types of rollers: the pick rollers, the feed rollers, and the separation rollers. The pick rollers grab the paper from the tray and feed it into the printer, while the feed rollers continue to move the paper through the printing process. The separation rollers ensure that only one sheet of paper is picked at a time, preventing multiple sheets from getting jammed.
When these rollers become dirty or covered in debris, they can cause a range of issues. Paper jams, misfeeds, and poor print quality are common problems that arise from dirty rollers. By cleaning them regularly, you can keep your printer running smoothly and prevent these frustrating issues from occurring.
Gathering the Necessary Tools
Before you begin cleaning your HP printer rollers, it’s important to gather the necessary tools and materials. You will need a lint-free cloth, such as a microfiber cloth, and a mild cleaning solution. Avoid using harsh chemicals or abrasive materials as they can damage the rollers. Additionally, it’s a good idea to have a pair of gloves to protect your hands during the cleaning process.
Safety is also a consideration when performing any maintenance task. Make sure to power off the printer and unplug it from the electrical outlet before starting the cleaning process. This will prevent any accidental damage and ensure your safety.
Preparation for Cleaning
With the necessary tools gathered, it’s time to prepare your printer for the cleaning process. Start by powering off the printer and disconnecting it from the power source. This will help avoid any electrical accidents and ensure your safety throughout the cleaning process. Once the printer is powered off, open the printer access panel to gain access to the internal components.
Inside the printer, you will find the printer rollers. These are usually located near the paper tray or cartridge area. Take a moment to locate the rollers before proceeding to the next step.
Cleaning HP Printer Rollers: Step-by-Step Guide
Now that you’ve prepared the printer, let’s dive into the step-by-step guide for cleaning the HP printer rollers:
Step 1: Removing the paper tray and cartridges
To access the rollers more easily, remove the paper tray and any cartridges from the printer. Set them aside in a safe place while you clean the rollers.
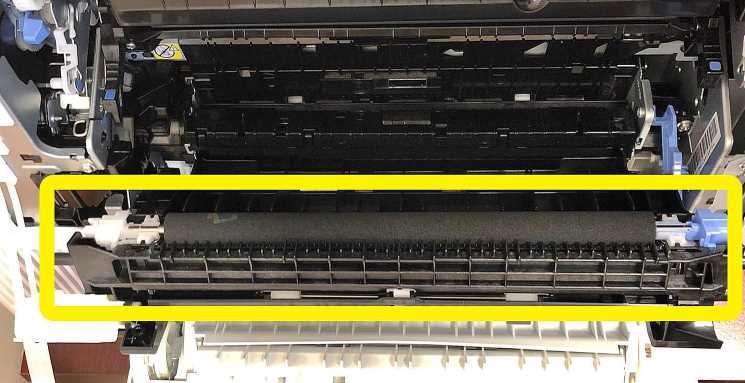
Step 2: Inspecting the rollers for debris or damage
Before cleaning the rollers, it’s important to inspect them for any debris or signs of damage. Carefully examine each roller and look for any paper scraps, dirt, or other particles that may be stuck on the surface. If you notice any damage, such as tears or cracks, it may be necessary to replace the rollers.
Clearing away debris and ensuring the rollers are in good condition will help optimize their performance and prevent any potential issues during the cleaning process.
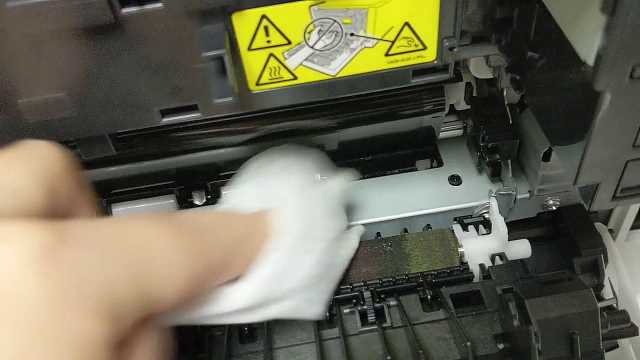
Step 3: Using a lint-free cloth and cleaning solution
Now it’s time to clean the HP printer rollers. Take your lint-free cloth and dampen it with a mild cleaning solution. Ensure that the cloth is not dripping wet, but slightly moistened to avoid excessive moisture on the rollers. Excess moisture can lead to paper jams or other printing problems.
Substep: Dampening the cloth with cleaning solution
Apply a small amount of the cleaning solution onto the lint-free cloth. You can use a mixture of water and mild detergent or a specialized printer roller cleaning solution. Gently rub the cloth together to distribute the solution evenly.
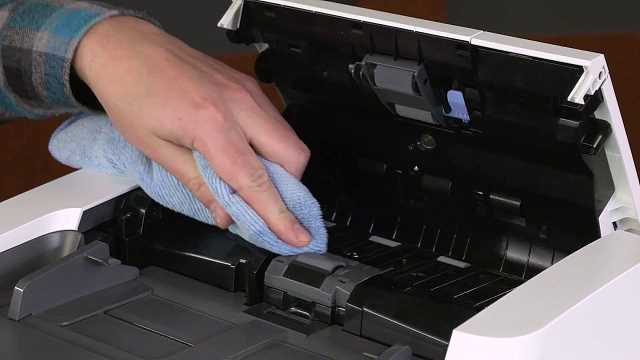
Substep: Wiping the rollers gently
With the dampened cloth, start wiping the rollers one by one. Use gentle, circular motions to remove any dirt, dust, or debris. Take your time and ensure that you cover the entire surface of each roller. If necessary, you can use a pair of tweezers or a cotton swab to reach tight spaces or remove stubborn particles.
Remember, the goal is to clean the rollers without applying excessive pressure or causing any damage. Be patient and thorough in your cleaning process.
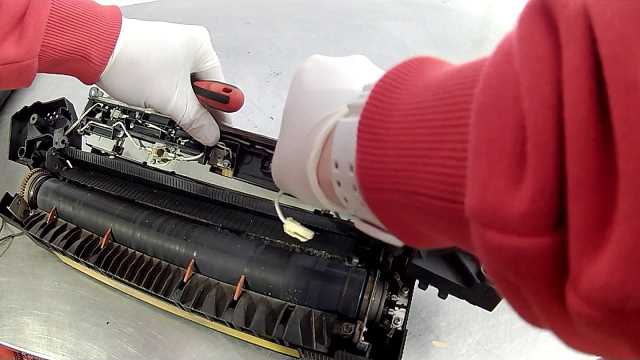
Step 4: Cleaning the secondary transfer roller (if applicable)
In addition to the main feed rollers, some HP printers may have a secondary transfer roller. This roller assists in transferring toner from the cartridge onto the paper. If your printer has a secondary transfer roller, it’s important to clean it as well.
Follow the same process as in Step 3 to clean the secondary transfer roller. Use the dampened lint-free cloth and gentle circular motions to remove any dirt or debris. Pay close attention to this roller as it directly affects print quality.
Step 5: Allowing the rollers to dry completely
After you have finished cleaning the rollers, it’s crucial to allow them to dry completely before reinstalling the paper tray and cartridges. Damp rollers can cause paper jams and affect print quality.
Give the rollers sufficient time to air dry naturally. Avoid using heat sources or compressed air to speed up the drying process, as this can damage the rollers. Once the rollers are completely dry, you can proceed to the final steps.
Final Steps
With the rollers now clean and dry, it’s time to put everything back together and get your printer ready for action.
Reinstalling the paper tray and cartridges
Carefully place the paper tray back into its original position, ensuring that it is securely inserted. Insert the cartridges back into their respective slots, making sure they are properly seated. Follow the manufacturer’s instructions or any specific guidelines provided with your printer for correct cartridge installation.
Closing the printer access panel
Once the paper tray and cartridges are back in place, close the printer access panel securely. This ensures that the internal components are protected and helps maintain the printer’s integrity. Double-check that the access panel is closed properly to avoid any errors or malfunctions.
Powering on the printer
Now that everything is back in place, it’s time to power on your printer. Reconnect the printer to the power source and press the power button to turn it on. Wait for the printer to go through its initialization process, which may take a few moments. Once the printer is ready, it’s time to put it to the test!
Testing Printer Performance
To ensure that the cleaning process has indeed improved the performance of your HP printer, it’s recommended to print a test page. Most HP printers have a built-in test page function that can be accessed through the printer’s settings or control panel.
Print a test page and carefully examine the results. Look for any noticeable improvements in print quality, such as clearer text, sharper images, and proper alignment. If you still encounter any issues, it may be necessary to repeat the cleaning process or consider other troubleshooting steps.
Maintenance Tips for HP Printer Rollers
To keep your HP printer rollers in optimal condition and ensure continued performance, it’s important to follow these maintenance tips:
Regular cleaning schedule
Make a habit of cleaning your printer rollers at regular intervals. Depending on your printer usage and environment, cleaning every few months or whenever you notice a decline in print quality is a good practice.
Keeping the printer environment clean
Maintaining a clean printing environment can significantly reduce the chances of debris or dust particles accumulating on the rollers. Keep the area around your printer clean and free from potential contaminants.
Avoiding rough or damaged paper
Using rough or damaged paper can increase the likelihood of debris getting trapped in the printer rollers. Always use high-quality paper that is compatible with your printer to minimize the risk of roller issues.
Troubleshooting Common Roller Issues
Despite regular maintenance, issues with printer rollers may still occur. Here are a couple of common problems and some troubleshooting considerations:
Paper jams caused by dirty rollers
If you’re experiencing frequent paper jams, it’s possible that the rollers are not clean enough or have developed a buildup of debris. Revisit the cleaning process outlined in this guide and ensure that you thoroughly clean the rollers. If the problem persists, consider contacting HP support for further assistance.
Roller wear and replacement considerations
Over time, printer rollers can wear out and lose their effectiveness. If you notice significant wear, cracks, or tears on the rollers, it may be necessary to replace them. Contact HP or consult the printer’s user manual for guidance on obtaining and installing replacement rollers.
Cleaning your HP printer rollers is a simple yet essential maintenance task that can greatly impact the overall performance of your printer. By following the step-by-step guide outlined in this article and incorporating regular maintenance into your routine, you can ensure that your printer operates at its best, producing high-quality prints and minimizing frustrating issues like paper jams.
Remember, a clean printer is a happy printer, and with a little effort, you can maximize your printer’s performance and enjoy hassle-free printing for years to come!
Leave a Reply