 Are you ready to take your carpentry skills to the next level? If you want to achieve a professional finish and add a touch of elegance to your base trim, then coping is the way to go! Coping base trim allows you to create seamless corners and a flawless look that will impress anyone who steps foot into your space. In this step-by-step tutorial, we’ll guide you through the process of coping base trim like a pro, from understanding the technique to the finishing touches. Get ready to enhance your carpentry game and master the art of base trim coping!
2. Understanding Base Trim and Coping
Before we dive into the nitty-gritty, let’s clarify what base trim and coping are all about. Base trim, also known as baseboard molding, is the decorative trim that runs along the bottom of the interior walls, covering the joint between the wall and the floor. It not only adds visual appeal but also protects the wall from scuffs and provides a smooth transition from floor to wall.
Coping, on the other hand, is a technique used to create precise corners where two pieces of base trim meet. Instead of relying on miter cuts or overlapping joints, coping involves cutting the end of one baseboard to fit perfectly against the profile of the adjacent piece. This method ensures a seamless joint, even if the walls are not perfectly square, and prevents unsightly gaps that can occur with other joining methods.
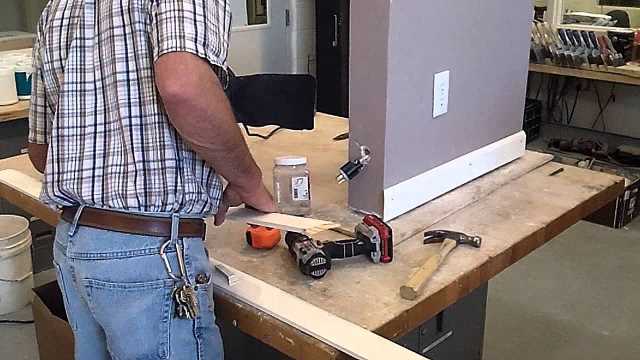
3. Tools and Materials Needed
Now that you understand the basics, let’s gather the tools and materials you’ll need to cope base trim like a pro. Here’s a list of essentials:
- Coping saw
- Miter saw or backsaw
- Tape measure
- Pencil or marker
- Sandpaper or sanding block
- Wood putty
- Adhesive or fasteners (nails or screws)
In addition to the tools, make sure to have the base trim itself, preferably primed and ready for installation. It’s also a good idea to have safety goggles and gloves to protect yourself during the process.
Safety should always come first, so remember to wear appropriate protective gear and take necessary precautions, such as securing the trim pieces properly and working in a well-ventilated area.
4. Preparing the Base Trim
Before you start coping, it’s essential to prepare the base trim for installation. Begin by measuring the length needed for each section of trim and make precise cuts using a miter saw or backsaw. Remember to double-check your measurements to ensure a perfect fit.
Once the base trim is cut to size, take a moment to inspect it for any imperfections or rough edges. Sand down any rough areas to achieve a smooth surface, as this will make the coping process much easier and result in a more polished final product.
5. Creating a Coping Template
Now comes the exciting part – creating a coping template! This step allows you to transfer the profile of the adjacent baseboard onto the cope piece for a precise fit. Here’s how to do it:
Start by placing the cope piece next to the adjacent baseboard, ensuring they are aligned properly. Use a pencil or marker to mark the profile of the adjacent baseboard onto the cope piece. This will serve as your guideline for cutting.
Once you have marked the profile, it’s time to grab your coping saw. Hold the cope piece securely in place, either with clamps or by hand, and begin cutting along the marked profile. Take your time and follow the lines as accurately as possible, using smooth and steady strokes. Remember, precision is key!
After you have completed the initial cut, take a moment to assess the fit. The cope piece should snugly fit against the profile of the adjacent baseboard, creating a seamless joint. If there are any areas that require fine-tuning, use the coping saw to make adjustments until the fit is perfect.
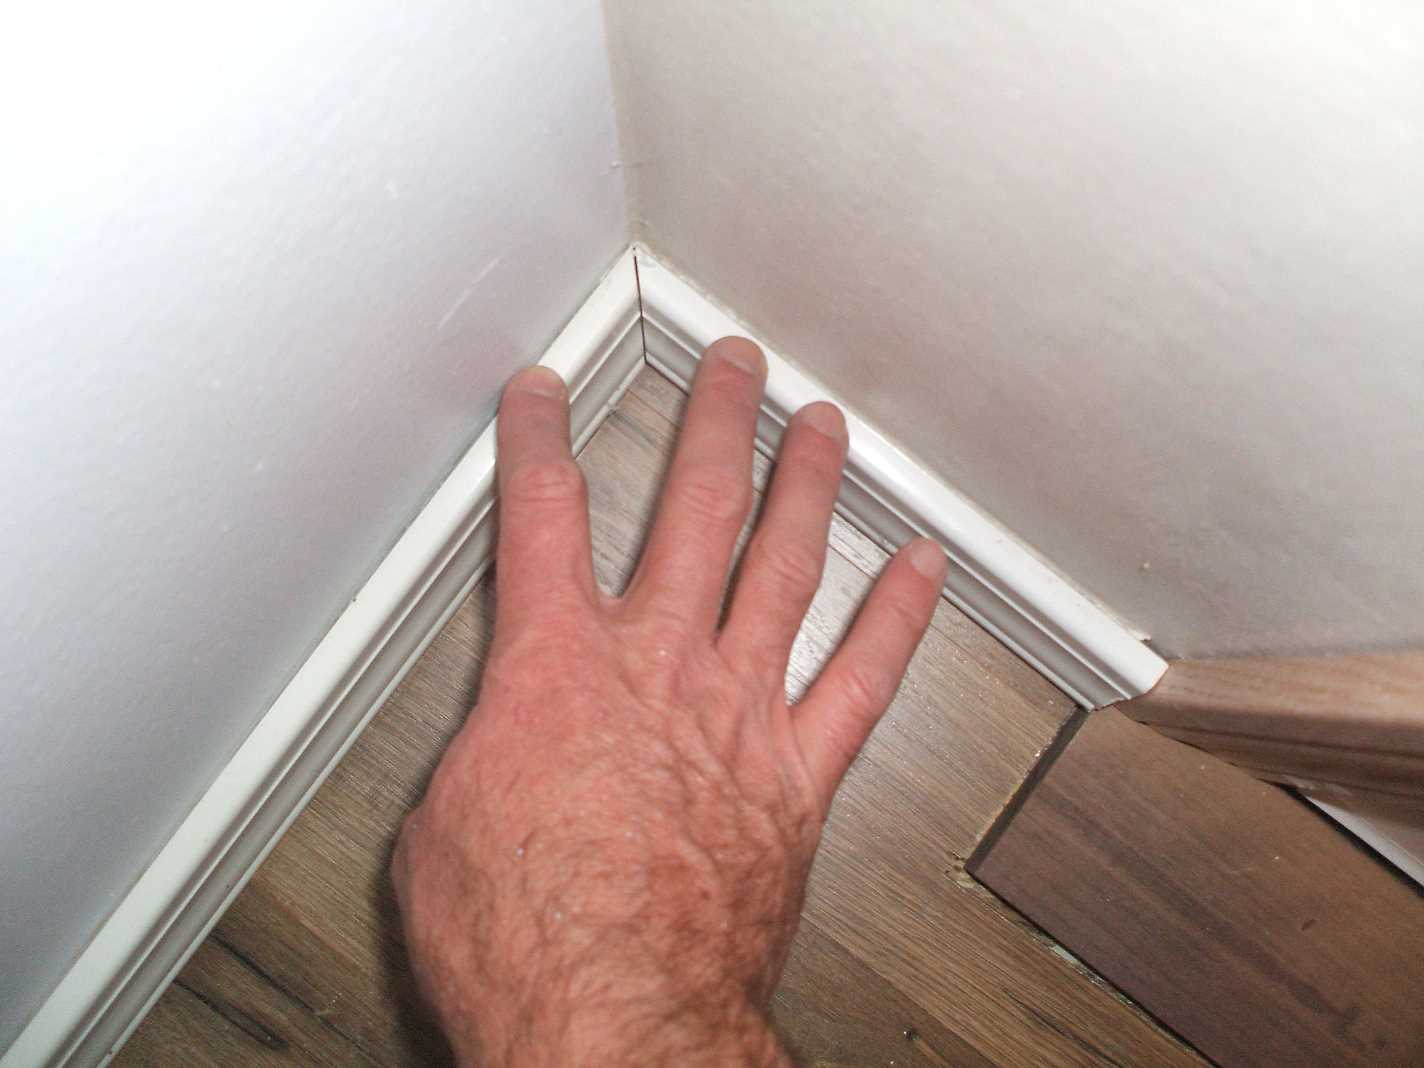
7. Installing the Copied Base Trim
Now that you have successfully coped the base trim, it’s time to install it and bring your project one step closer to completion. Apply a suitable adhesive or use fasteners like nails or screws to secure the base trim in place. Start at one end and work your way along the wall.
As you install each section of base trim, make sure to align it properly and press it firmly against the wall. This will ensure a tight fit and a professional finish. Pay special attention to the cope joint, ensuring it seamlessly aligns with the adjacent baseboard without any visible gaps.
Take a step back and admire your handiwork. The base trim should now beautifully frame your space and create an elegant transition between the floor and the wall.
8. Finishing Touches
To achieve a flawless final look, it’s time for the finishing touches. Fill any gaps or nail holes with wood putty, using a putty knife or your finger to smooth it out. Allow the putty to dry according to the manufacturer’s instructions.
Once the putty is dry, grab some sandpaper or a sanding block and gently sand the base trim. This will ensure a smooth and even surface, ready for the next step. Wipe away any dust or debris with a clean cloth or brush.
Finally, apply a coat of paint or stain to match your desired aesthetic. Whether you prefer a classic white or a rich wood tone, the choice is yours. Take your time and apply the paint or stain evenly, allowing it to dry completely between coats if necessary. And voila! Your base trim is now ready to impress.
9. Tips and Troubleshooting
As with any skill, practice makes perfect. Don’t be discouraged if your first attempts at coping base trim aren’t flawless. Keep practicing, refining your technique, and soon you’ll be coping like a pro.
While coping is an excellent method for achieving seamless corners, there are alternative methods you can explore, such as using corner blocks or mitered joints. Experiment with different techniques and find the one that works best for your project.
For those looking to take their base trim coping skills to the next level, here are a few expert tips:
- Take your time and work slowly and methodically.
- Invest in high-quality tools for more precise cuts.
- Always double-check your measurements before cutting.
- Maintain a clean and organized workspace for better efficiency.
- Seek inspiration and guidance from professional carpenters or online resources.
10. Conclusion
Congratulations! You’ve now learned how to cope base trim like a pro. By following this step-by-step tutorial, you can achieve a professional finish and elevate the aesthetics of your space. Remember, attention to detail is crucial in carpentry work, and coping base trim is no exception. Practice, refine your skills, and soon you’ll be coping with precision and confidence.
So go ahead, gather your tools, measure, cut, cope, and install with enthusiasm. Let your creativity shine as you add the perfect finishing touches to your base trim. Whether you’re a beginner or an experienced DIYer, mastering the art of base trim coping will open up a world of possibilities for enhancing the beauty of your home.
Happy coping, and may your base trim always bring joy and elegance to your space!
Leave a Reply