 Are you ready to take your skateboarding skills to new heights? If so, it’s time to embark on an exciting DIY
skateboarding project: building your very own mini quarter pipe! Not only will this project unleash your
creativity and handyman spirit, but it will also provide you with an awesome ramp to practice your tricks and
master new moves. So, grab your tools and let’s get started on this thrilling adventure!
Learning how to build a mini quarter pipe is not only a fun and rewarding experience but also an essential skill
for any skateboarder. By constructing your own ramp, you’ll gain a deeper understanding of the sport and develop
a stronger connection to your board. Plus, you’ll have the freedom to customize the ramp according to your
preferences and style. So, get ready to roll up your sleeves and dive into this exciting DIY project!
2. Understanding the Mini Quarter Pipe
Before we dive into the construction process, let’s understand what a mini quarter pipe is all about. A mini
quarter pipe is a small ramp with a curved transition, resembling a quarter of a full pipe. It provides a smooth
and controlled surface for skaters to perform tricks, practice transitions, and improve their overall skills. The
compact size of a mini quarter pipe makes it ideal for backyard setups, garages, or smaller spaces where a larger
ramp may not be feasible.
Having a mini quarter pipe in your skateboarding arsenal comes with a multitude of benefits. Firstly, it allows
you to practice and refine your techniques in a safe and controlled environment. Secondly, it offers endless
possibilities for creativity and progression, allowing you to experiment with various tricks and combinations.
Lastly, it provides an opportunity to connect with the skateboarding community by inviting friends over for epic
sessions and competitions.
To start building your mini quarter pipe, you’ll need a few essential materials and tools. Materials typically
include plywood for the ramp surface, framing lumber for the structure, and coping for the edge. Tools you’ll
need include a measuring tape, circular saw or jigsaw for cutting the wood, a drill for securing the pieces
together, and various screws and nails. It’s important to gather all the necessary materials and tools before
beginning the construction process to ensure a smooth workflow.
3. Step-by-Step Guide: How to Build a Mini Quarter Pipe
Now that you have your materials and tools ready, let’s dive into the step-by-step process of building your mini quarter pipe. Follow these instructions closely, and you’ll have your very own ramp in no time!
Step 1: Preparing the workspace: Start by clearing the area where you plan to build your mini quarter pipe. Make sure you have enough space and a level surface to work on. This will ensure stability and safety during the construction process.
Step 2: Measuring and marking the dimensions: Use your measuring tape to determine the desired dimensions for your ramp. Quarter pipes typically have a height ranging from 2 to 4 feet and a width of around 8 feet. Mark the measurements on your plywood and framing lumber to guide your cutting and assembly process.
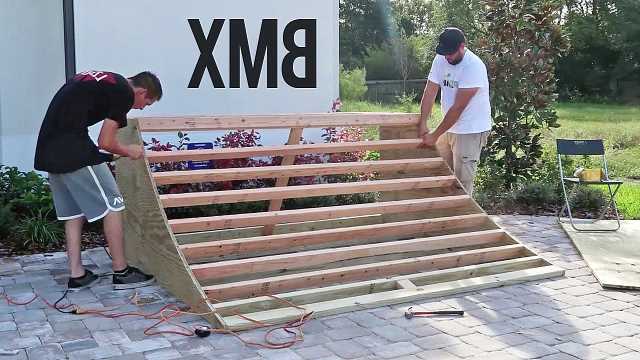
Step 3: Cutting the plywood and framing the structure: Using a circular saw or jigsaw, carefully cut the plywood into the desired shape for your ramp’s surface. Next, cut the framing lumber into the necessary lengths and angles to create the frame of your quarter pipe. Make sure to double-check your measurements to ensure everything fits together perfectly.
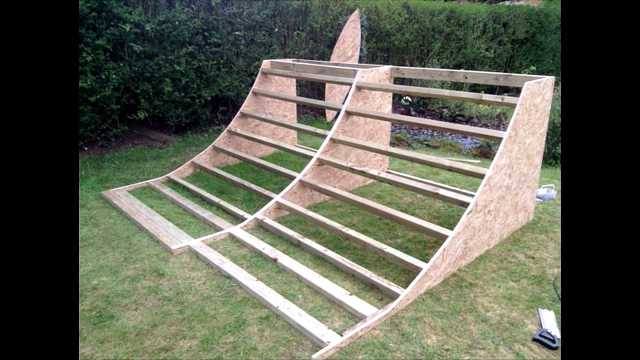
Step 4: Attaching supports and bracing: Begin assembling the frame by attaching the framing lumber together using screws or nails. Use additional supports and bracing to reinforce the structure and provide stability. This step is crucial to ensure the durability and longevity of your mini quarter pipe.
Step 5: Installing the transition and coping: The transition is the curved part of the quarter pipe that allows for smooth riding and transitions. Cut the transition piece from plywood or purchase a pre-made transition. Secure it to the frame using screws or nails. Attach coping to the top edge of the ramp, providing a smooth surface for grinding and sliding. Make sure the coping is securely fastened to the ramp.
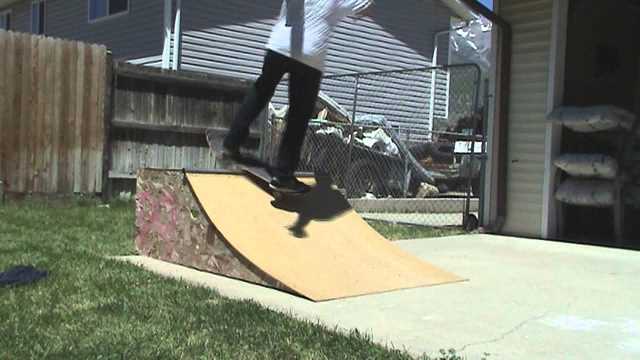
Step 6: Sanding and finishing touches: Smooth out any rough edges or surfaces with sandpaper. This will help prevent splinters and provide a polished finish. You can also add paint or sealant to protect the wood and customize the appearance of your mini quarter pipe. Let it dry thoroughly before taking it for a test ride!

4. Safety Considerations
Safety should always be a top priority when building and using your mini quarter pipe. Here are some essential safety considerations to keep in mind throughout the process:
Protective gear and equipment recommendations: Wear a helmet, knee pads, elbow pads, and wrist guards while skateboarding on your ramp. These protective gears will minimize the risk of injuries and provide added confidence during your skate sessions. It’s also important to have a first aid kit nearby in case of any accidents.
Sturdy construction: Ensure that your ramp is structurally sound and securely built. Double-check all the connections and make any necessary adjustments to avoid potential hazards while skating. Regularly inspect and maintain your mini quarter pipe to keep it in good condition and prolong its lifespan.
5. Tips and Tricks for Building a Mini Quarter Pipe
Building a mini quarter pipe can be a challenging but incredibly rewarding endeavor. Here are some tips and tricks to help you along the way:
Advice for a smoother construction process: Plan your project carefully, gather all the necessary materials and tools beforehand, and follow the instructions step by step. Take your time with each stage of the construction to ensure accuracy and precision. Don’t hesitate to seek guidance from online tutorials, forums, or experienced skateboarders if you need additional assistance.
Common pitfalls to avoid: One common mistake is not properly bracing the ramp, leading to instability and potential accidents. Ensure that the structure is well-supported and secure. Additionally, make sure your ramp is positioned on a level surface to prevent wobbling or tilting during use.
Creative modifications and customization options: Feel free to get creative with your mini quarter pipe! Add unique features like additional ramps, extensions, or rails to expand the possibilities for tricks and stunts. Personalize your ramp with vibrant paint colors, stickers, or artwork to make it truly one-of-a-kind.
6. Conclusion
Congratulations! You’ve learned the ins and outs of building a mini quarter pipe for skateboarding. This DIY project not only enhances your skateboarding experience but also unleashes your creativity and craftsmanship. Remember to prioritize safety throughout the construction process and whenever you’re riding your ramp.
Now it’s time to put your skills to the test and start building your very own mini quarter pipe. Enjoy the process, have fun, and be proud of your accomplishment. Get ready to shred and take your skateboarding journey to new heights with your custom-made ramp!
Leave a Reply