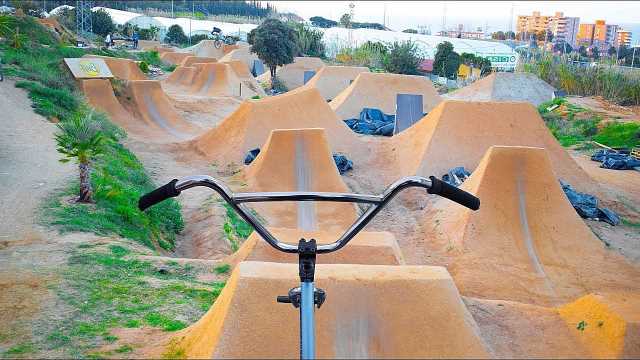
 Welcome, adrenaline junkies and outdoor enthusiasts! Are you ready to embark on an exciting journey of constructing your very own BMX jumps? In this guide, we’ll delve into the exhilarating world of dirt jump building. So, what exactly are dirt jumps? Well, they are specially crafted mounds of earth designed to launch you and your bike into the air, providing an electrifying experience that defies gravity!
Now, before we jump into the construction process, let’s emphasize the importance of proper construction techniques and safety measures. Building dirt jumps is not only about creating epic airtime but also ensuring a safe and enjoyable riding experience. So, fasten your helmets, grab your shovels, and let’s get ready to dig into the essential steps and safety precautions of constructing your very own dirt jumps!
Planning and Preparation
First things first, let’s assess the available space for your dirt jumps. Look for an area with enough room to accommodate your desired jump layout and size. Remember, the more space you have, the more creative you can get with your jumps! Once you’ve found the perfect spot, it’s important to determine the layout and size of your jumps. Visualize the lines you want to ride, the takeoff and landing areas, and any additional features you’d like to incorporate.
Before you start digging, check if you need any permissions or permits from local authorities or landowners. Safety is our top priority, and it’s essential to respect any rules or regulations in your area. Once you’re good to go, gather the necessary tools and materials. You’ll need shovels, rakes, wheelbarrows, compactors, and, of course, plenty of dirt! So, grab your buddies, make a list, and head to the hardware store to stock up on all the essentials!
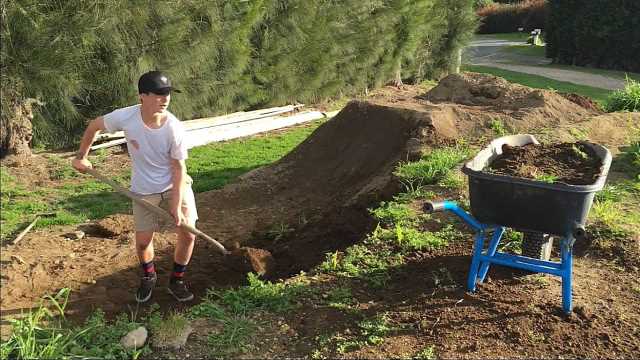
Site Preparation
Now that you have everything you need, it’s time to prepare the site for your dirt jumps. Start by clearing the area of any debris or vegetation. Make sure there are no rocks, tree stumps, or other obstacles that could pose a hazard. Once the area is clean, it’s time to level the ground. This will provide a smooth and even surface for your jumps.
Next, mark the jump locations and desired lines using bright colored flags or spray paint. This will give you a visual guide as you begin shaping the jumps. Remember, precision is key! Take your time to get the markings just right, ensuring that each jump is perfectly aligned with your vision. Now that the site is prepped and ready, let’s move on to the exciting part – shaping the jumps!
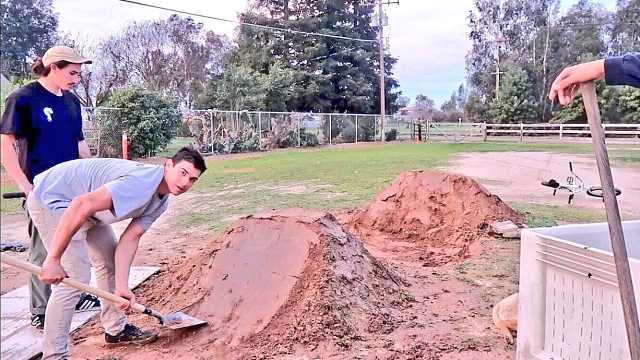
Shaping the Jumps
Now comes the moment you’ve been waiting for – shaping the jumps! Start by establishing the takeoff and landing areas. These are the crucial components that determine the height and distance of your jumps. Make sure they are well-defined and properly aligned. Once you have the foundation set, it’s time to build up the jumps using compacted soil or clay.
Remember, the key to a solid jump is proper compaction. Pack the soil or clay tightly as you build up the jumps, layer by layer. This will ensure stability and durability. As you shape the jumps, focus on achieving the desired height and smooth transition. Pay attention to the slope angles, as they greatly influence the speed and trajectory of your jumps. A well-shaped jump will provide the perfect launch pad for your BMX adventures!
Pack and Shape
Once you’ve shaped the jumps, it’s time to pack them down for stability. Use your shovel or a compactor to firmly pack the soil. This will prevent erosion and maintain the shape of the jumps. If you want to take it a step further, you can use water or rollers to further compact the soil. This will create a solid and reliable surface that can withstand countless jumps and tricks.
As you pack down the jumps, keep an eye on their shape. Make sure they are smooth and consistent, free from any bumps or irregularities. Take the time to refine the shape, ensuring that each jump offers a seamless transition for your riding pleasure. A well-packed and properly shaped jump will amplify your BMX experience!
Adding Features and Options
To spice things up and add more excitement to your dirt jumps, consider incorporating additional features and options. Berms or corners can be a fantastic addition, enhancing the flow and allowing you to maintain speed while navigating turns. Tabletops or gaps can provide a thrilling challenge for advanced riders, allowing them to showcase their skills and creativity.
Furthermore, don’t forget about step-ups or step-downs! These variations in elevation can add variety to your jump line, making it more engaging and dynamic. Experiment with different features and options to find the perfect mix that suits your riding style and preferences. The possibilities are endless when it comes to customizing your dirt jumps!
Safety Precautions
When it comes to dirt jump building, safety should always be a top priority. Before you begin riding, make sure you’re wearing appropriate safety gear. A well-fitted helmet, knee pads, elbow pads, and sturdy shoes are essential to protect yourself from potential injuries. Safety should never be compromised!
Regularly inspect your jumps for stability and integrity. Check for any signs of erosion, loose soil, or other hazards. It’s also a good idea to install warning signs and barriers around the jumps to alert others to their presence. This will help prevent accidents and ensure that everyone enjoys the jumps responsibly.
Lastly, remember that maintenance and repairs are crucial for the longevity and safety of your jumps. Regularly groom the jumps, removing any excess debris or loose soil. Fill in any ruts or holes to maintain a smooth riding surface. By taking care of your jumps, you’re not only ensuring your safety but also prolonging the fun and excitement they bring!
Test and Adjust
Once you’ve completed the construction of your dirt jumps, it’s time to put them to the test. Start by taking it slow and gradually building up your speed and confidence. Pay attention to the jumps’ performance, and make note of any adjustments that may be needed. You may find that certain jumps need a slight tweak in shape or slope to achieve the desired ride.
Don’t hesitate to seek feedback from experienced riders. They can provide valuable insights and suggestions for improving your jumps. Remember, it’s a continuous learning process, and there’s always room for refinement. With each test ride and adjustment, you’ll be one step closer to creating the ultimate dirt jump experience!
Conclusion
Congratulations on completing your crash course in dirt jump building! We’ve covered the essential steps and safety precautions to help you construct your very own BMX jumps. From planning and preparation to shaping the jumps and incorporating features, you now have the knowledge to create your personal playground of adrenaline-pumping excitement!
Always remember the importance of safety and responsible riding. Enjoy your jumps, but do so with respect for yourself, others, and the environment. Now, go out there, grab your bike, and let the dirt fly as you embark on thrilling adventures with your newly constructed dirt jumps!
Leave a Reply