 Welcome to the exciting world of high striker construction! If you’ve ever been to a carnival or fair, you’ve probably seen a high striker game in action. It’s that exhilarating attraction where participants swing a mallet and try to hit a lever hard enough to ring a bell at the top. But have you ever wondered how these fantastic contraptions are built? In this guide, we’ll delve into the ins and outs of constructing a high striker from scratch, so get ready to unleash your inner builder and create a marvel!
A high striker is more than just a game; it’s an embodiment of fun and achievement. By constructing your high striker like a professional, you’ll not only gain a sense of accomplishment but also ensure its durability and functionality. So, let’s dive in and explore the fascinating world of high striker construction!
Understanding the High Striker
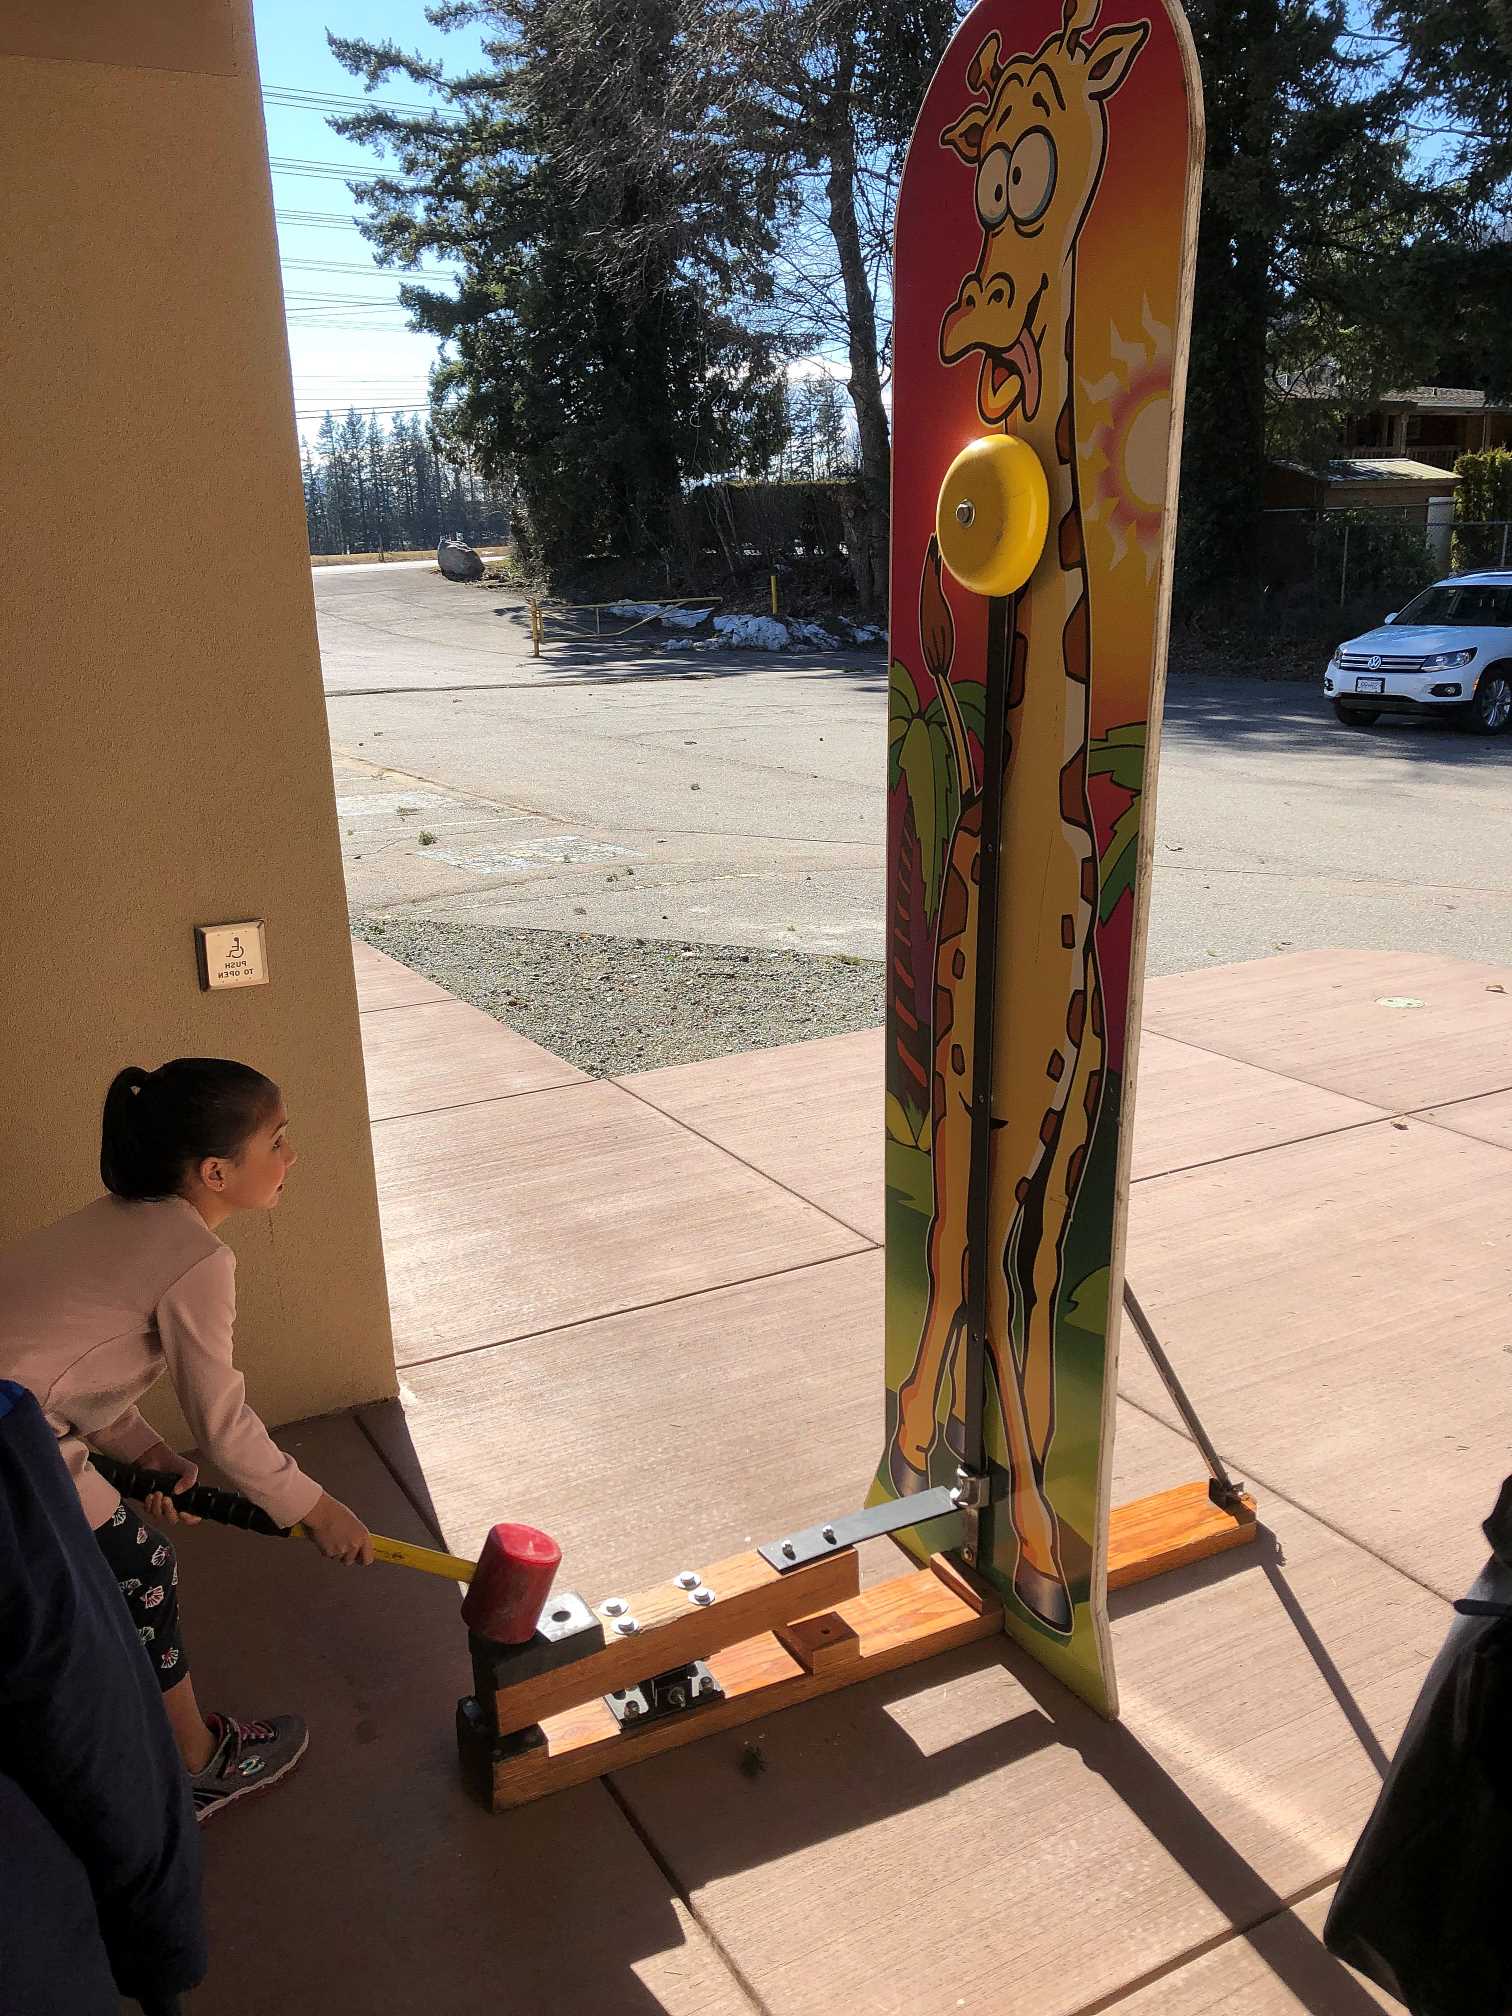
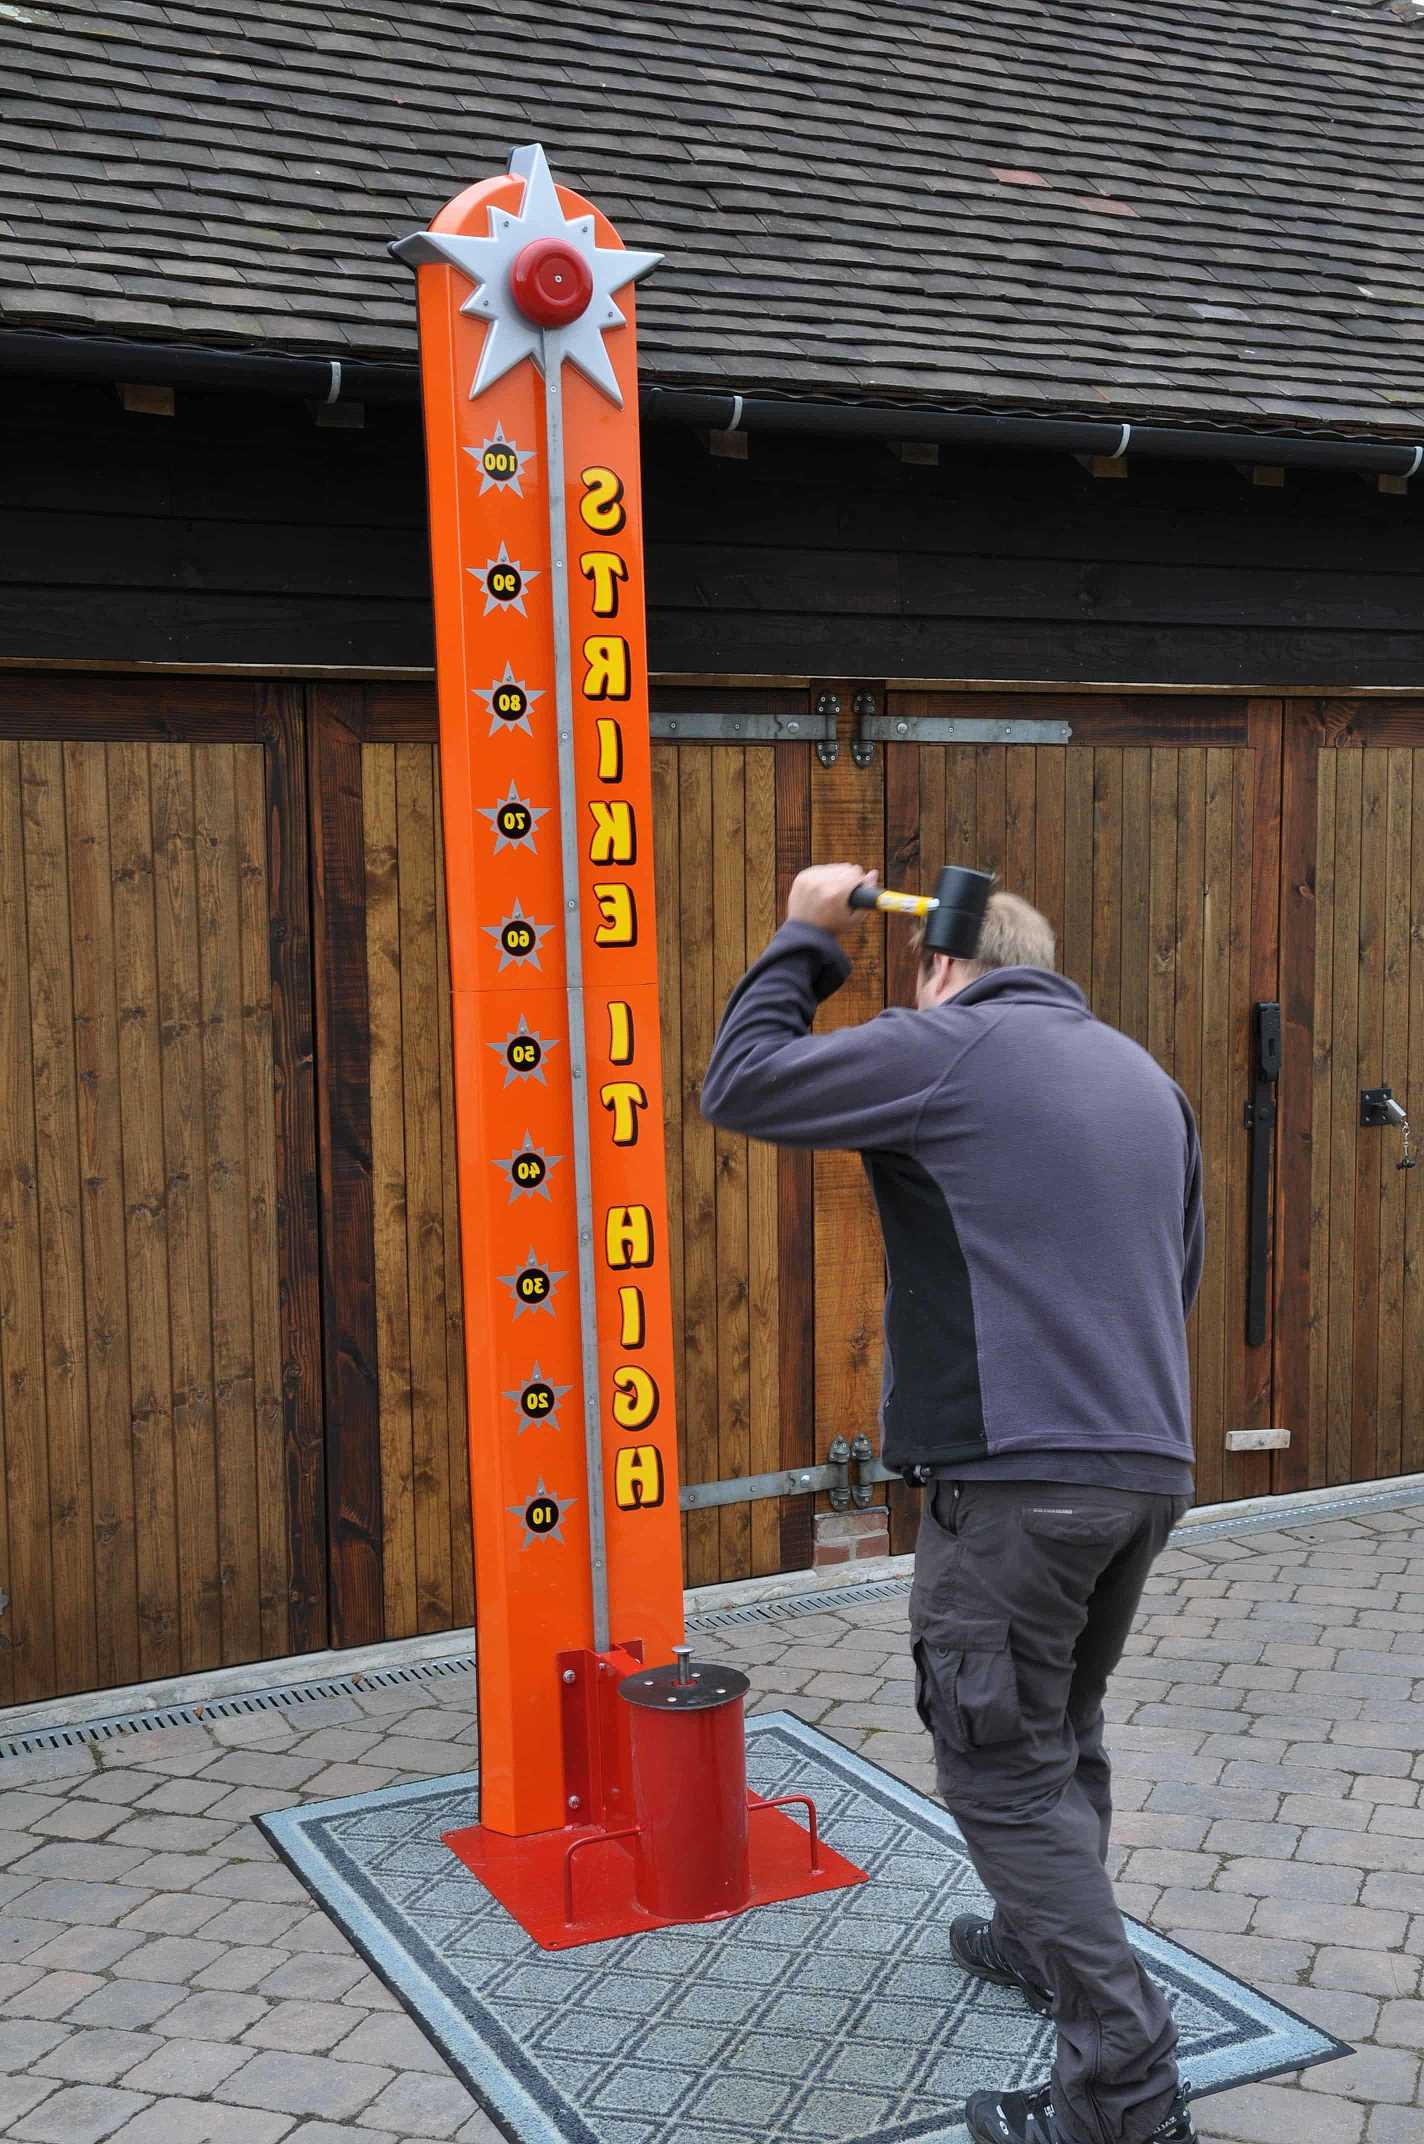
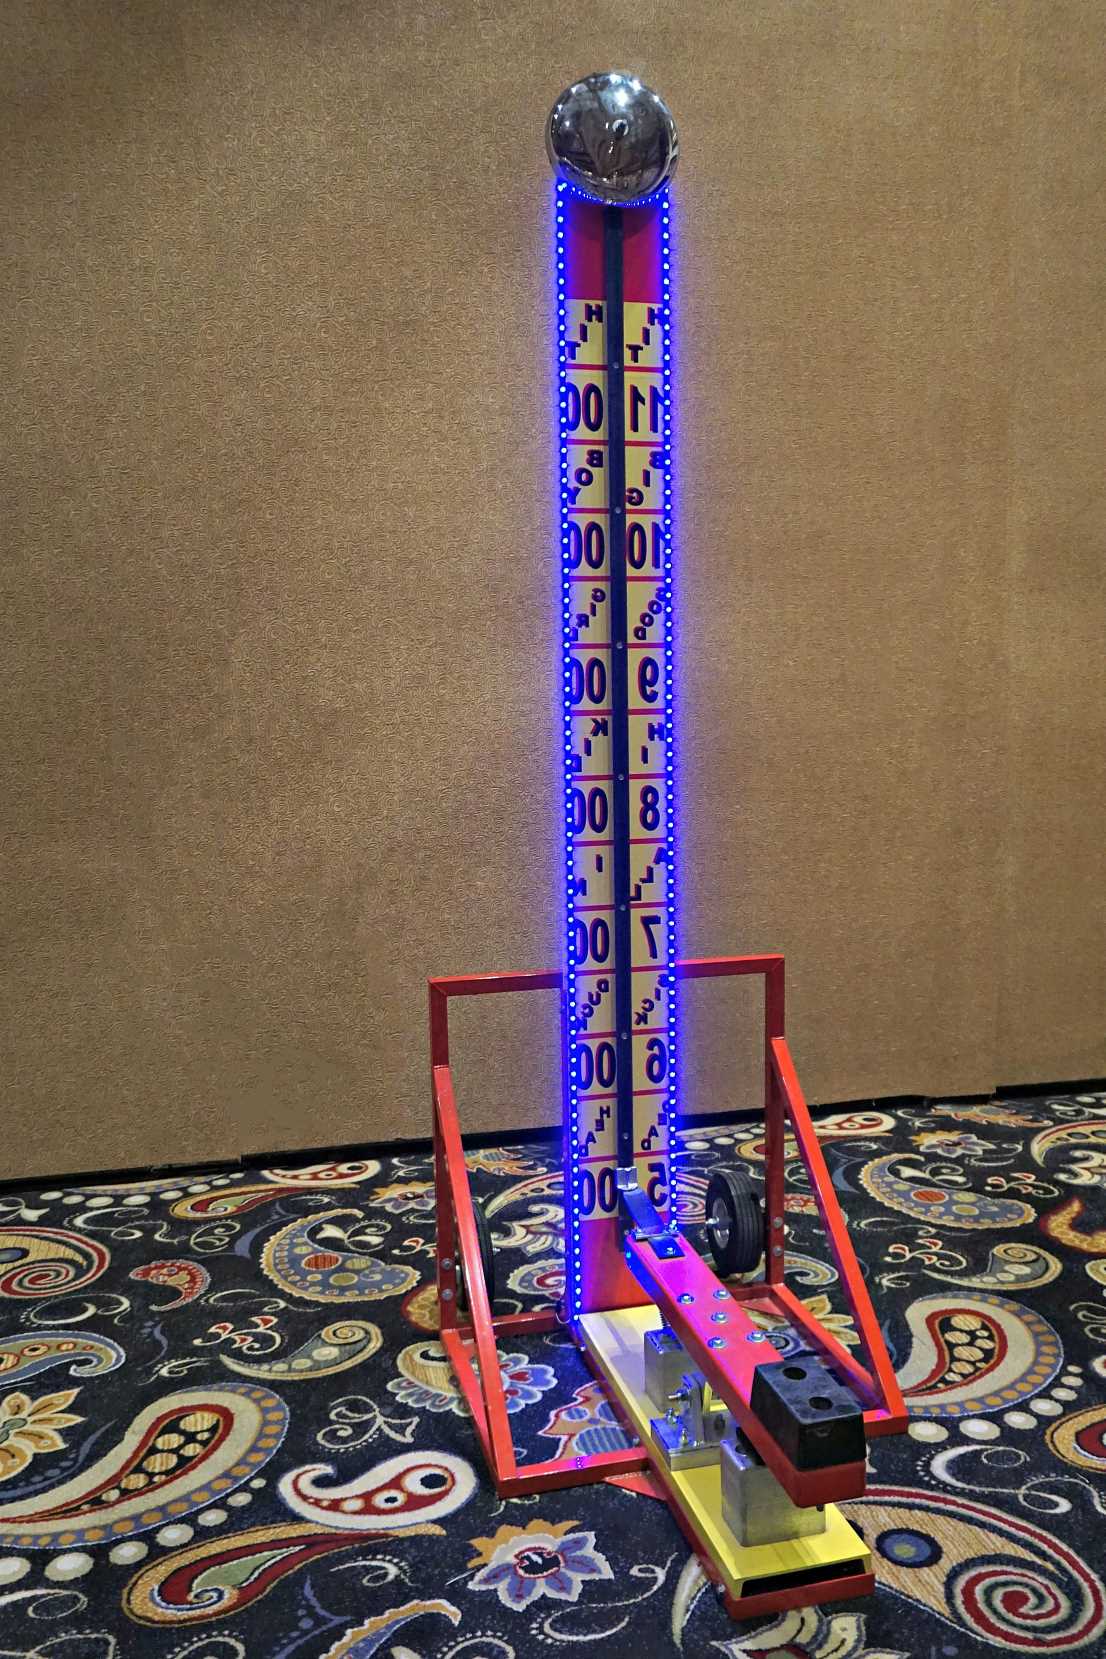
Before we start building, let’s take a moment to understand the components and functionality of a high striker. A high striker consists of several key elements: a sturdy base, a frame, a striker mechanism, and a bell. The base provides stability, while the frame supports the striker mechanism and the bell at the top. The striker mechanism is the heart of the high striker, responsible for launching the mallet and hitting the lever to ring the bell. It’s crucial to comprehend these components to ensure a successful construction process.
High strikers come in various types and designs, each with its own charm and appeal. From classic wooden structures to modern steel constructions, you have the freedom to choose a style that suits your taste. Whether you prefer a traditional carnival look or a sleek contemporary design, the possibilities are endless!
Gathering the Necessary Tools and Materials
Now that you have a good grasp of what makes a high striker tick, it’s time to gather the tools and materials required for this exciting project. To build your high striker like a pro, you’ll need a few essential tools such as a saw, drill, hammer, measuring tape, and wrench. These tools will help you cut, shape, and assemble the various components of your high striker.
When it comes to materials, the choice depends on your preferences and budget. Common materials for high striker construction include wood, metal, and PVC. Wood offers a classic and rustic feel, while metal provides durability and strength. PVC, on the other hand, offers a lightweight and affordable option. Consider your construction goals and select the materials that best suit your needs.
Planning and Designing Your High Striker
Before you start swinging hammers and cutting wood, it’s important to set clear goals and objectives for your high striker project. Ask yourself, what size and height do you envision for your high striker? What level of craftsmanship are you aiming for? By defining these goals, you’ll have a clear roadmap for the construction process.
Once you have your goals in mind, it’s time to sketch and create a blueprint for your high striker. Grab a pencil and paper or use a digital design tool to visualize your ideas. Draw out the dimensions, the placement of components, and any decorative details you want to include. Having a blueprint will serve as a guide throughout the construction process, ensuring that you stay on track and achieve your desired results.
Step-by-Step Guide: How to Build a High Striker
Foundation and Base Construction
The first step in building your high striker is preparing the ground and leveling the foundation. Clear the area where you plan to install your high striker and ensure it is flat and stable. Next, construct a sturdy base that will provide the necessary support and stability for your high striker. Use the appropriate tools and materials to build a solid foundation that can withstand the force of the mallet strikes.
Frame and Structure Assembly
Now it’s time to tackle the frame and structure of your high striker. Cut and shape the frame components according to your blueprint. Ensure that each piece is precise and fits together seamlessly. Use sturdy joinery techniques, such as screws or bolts, to securely assemble the frame. A solid and well-built frame will provide the backbone for your high striker, ensuring its stability and longevity.
Creating the Striker Mechanism
The striker mechanism is the heart of your high striker, responsible for delivering the powerful blow that will propel the mallet and ring the bell. Choose durable and resilient materials for the striker, considering factors such as weight, balance, and impact resistance. With the selected materials, carefully assemble the striker mechanism, ensuring smooth movement and precise alignment. Test it out to make sure it functions properly and delivers the desired striking force.
Adding the Bell and Decals
Selecting the right bell is essential to achieve that satisfying ring when the lever is struck. Choose a bell that is both durable and produces a pleasant sound. Once you have your bell, carefully attach it to the top of the high striker, making sure it is securely fastened. Additionally, consider adding decals and decorations to personalize your high striker and give it a festive touch. Get creative and let your personality shine!
Painting and Finishing Touches
Now that the construction of your high striker is complete, it’s time to add some color and protective finishes. Prepare the high striker for painting by sanding any rough surfaces and applying a primer coat. Choose vibrant colors that will make your high striker stand out and reflect your unique style. Once the paint has dried, apply a durable finish and protective coating to protect your creation from the elements. This will help maintain its appearance and extend its lifespan.
Testing and Fine-Tuning Your High Striker
Now that your high striker is fully constructed, it’s important to ensure it functions safely and efficiently. Before inviting others to play, take the time to test the high striker yourself. Check the stability of the base, the smoothness of the striker mechanism, and the ringing of the bell. Make any necessary adjustments or fine-tuning to optimize its performance. Safety should be a top priority, so ensure that all components are securely fastened and there are no sharp edges or protrusions that could cause harm.
Invite some friends or family members to test your high striker as well. Observe their experience and gather feedback on any areas that may require improvement. This will not only help you identify any potential issues but also add an element of fun and excitement to the process. With each adjustment and refinement, your high striker will become even more impressive and enjoyable to use.
Maintenance and Care
To keep your high striker in optimal condition for years to come, it’s important to implement regular maintenance routines. Inspect the structure periodically, checking for any signs of wear and tear. Replace any worn-out or damaged components promptly to maintain its performance and safety. Additionally, keep your high striker clean and free from debris that may affect its functionality. Regularly oil the moving parts to ensure smooth operation.
During periods of non-use, consider covering your high striker or storing it in a sheltered area to protect it from the elements. Extreme weather conditions can have a negative impact on the durability and appearance of your creation. By taking these simple maintenance steps, you’ll ensure that your high striker remains a source of joy and amusement for years to come.
Take pride in your creation and showcase it to others. Let your high striker become the centerpiece of your gatherings and celebrations. Share your knowledge and experience with others who might be interested in constructing their own high strikers. Remember, the joy of building doesn’t end here. You can always explore new designs, experiment with different materials, and continue refining your high striker construction skills.
Now, it’s time to grab that mallet and give your high striker a swing. Ring that bell and let the world know that you’ve built a high striker like a pro!
Leave a Reply