 Fudge holds a special place in the world of confectionery, tantalizing our sweet tooth and providing moments of pure indulgence. But what happens when your fudge-making endeavors don’t go as planned? Don’t fret! In this article, we’ll dive into the art of fudge-making and explore the secrets to fixing fudge mishaps like a seasoned pro.
Understanding the Challenges in Fudge-making
Before we embark on our fudge-fixing journey, it’s essential to identify the common problems that can plague our sweet creations. Three notorious culprits often rear their heads: grainy texture, crumbly consistency, and sticky or gooey fudge. These issues can turn a promising batch of fudge into a disappointing disaster.
Grainy texture occurs when the sugar crystals in the fudge haven’t fully dissolved, resulting in an unpleasant, sandy mouthfeel. On the other hand, crumbly consistency means your fudge lacks the smooth, melt-in-your-mouth quality we all adore. Lastly, sticky or gooey fudge can leave your fingers coated in a syrupy mess instead of delivering that satisfying bite.
What causes these fudge fiascos, you ask? Well, improper temperature control takes the crown for most problems. If the temperature isn’t just right, the fudge won’t set properly. Additionally, improper ingredient ratios and insufficient mixing or cooling can also contribute to a less-than-perfect outcome. But fret not! We’re here to guide you through the art of fudge restoration.
Essential Tools and Ingredients
Before we delve into the nitty-gritty of fudge repair, let’s ensure we have the necessary tools and high-quality ingredients at our disposal. To achieve fudge excellence, you’ll need a few trusty companions:
- Candy thermometer: A reliable candy thermometer will be your best friend throughout the fudge-making process, ensuring precise temperature control.
- Heavy-bottomed saucepan: A sturdy saucepan with a thick base distributes heat evenly, preventing scorching and promoting even cooking.
- Heat-resistant spatula: A heat-resistant spatula comes in handy for stirring and scraping the sides of the saucepan, ensuring your fudge is mixed to perfection.
Equipped with these tools, let’s not forget the importance of high-quality ingredients. After all, a masterpiece can only be created with the finest components:
- Choosing the right chocolate: Opt for high-quality chocolate with the right balance of sweetness and richness, as it forms the backbone of your fudge.
- Selecting the sweeteners and flavorings: Whether you prefer classic cane sugar, sweetened condensed milk, or delectable add-ins like vanilla extract or crushed nuts, make sure they’re of excellent quality to elevate your fudge to the next level.

Step-by-Step Guide: How to Fix Fudge
Now that we’re equipped with the necessary tools and ingredients, let’s dive into the step-by-step process of fixing fudge mishaps and transforming them into delectable delights. Here’s a basic fudge base recipe to get started:
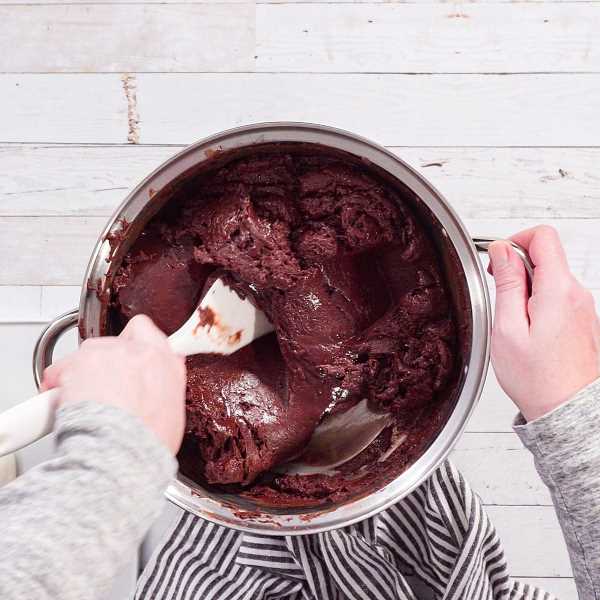
Addressing Grainy Texture: If your fudge has an unwanted grainy texture, fear not! There are a couple of techniques you can employ to salvage it. First, try reheating the fudge gently over low heat while stirring continuously. This process helps the sugar crystals dissolve further and results in a smoother texture. Another method is to incorporate a small amount of liquid, such as heavy cream or milk, into the fudge mixture. This helps to rehydrate the sugar crystals and create a more velvety consistency.
Correcting Crumbly Consistency: When your fudge crumbles instead of maintaining a soft, chewy texture, a little extra fat or moisture can work wonders. Add a small amount of butter or cream to the mixture and gently heat it over low heat until the fat is fully incorporated. This helps bind the ingredients together and prevents crumbly fudge. Alternatively, you can use an emulsifier like lecithin or corn syrup, which helps stabilize the fudge mixture and creates a smoother, more cohesive texture.
Overcoming Sticky or Gooey Fudge: Sticky or gooey fudge can be a result of undercooking or improper ingredient ratios. To fix this issue, you can re-cook the fudge to the proper temperature as indicated by your candy thermometer. Simply heat the fudge mixture over medium heat, stirring constantly until it reaches the desired temperature. If the stickiness persists, adjusting the ingredient ratios might be necessary. Try adding a bit more chocolate or sweetened condensed milk to balance out the texture and achieve that perfect consistency.
Troubleshooting Common Mistakes
Now that we’ve covered some techniques to fix fudge, let’s explore a couple of common mistakes that can occur during the fudge-making process and how to prevent or salvage them.
Preventing Fudge from Setting: If your fudge refuses to set and remains runny, the cooking temperature might be to blame. Ensure that you’re heating the fudge mixture to the correct temperature as specified in your recipe. Using a candy thermometer is crucial here. Additionally, the cooling time is essential for proper setting. Allow the fudge to cool gradually at room temperature before transferring it to the refrigerator to achieve the desired firmness.
Dealing with Burnt or Scorched Fudge: Burnt or scorched fudge can be disheartening, but all hope is not lost. If only a portion of your fudge is burnt, carefully separate the unburnt portion from the scorched area. Be cautious not to scrape any burnt bits into the salvageable fudge. In the future, prevent scorching by using a heavy-bottomed saucepan and stirring continuously over medium heat. You can also consider using a double boiler setup to minimize the risk of scorching.

Tips for Perfect Fudge Every Time
Now that you’re well-versed in fudge rescue techniques, let’s explore some tips and tricks to ensure your fudge turns out perfect from the get-go:
Temperature Control Techniques: Master the art of temperature control by using a candy thermometer. This little tool allows you to monitor the temperature accurately, ensuring that your fudge reaches the desired consistency. Additionally, familiarize yourself with the soft-ball stage, where a small amount of the fudge mixture dropped into cold water forms a soft ball that holds its shape but is still pliable. This stage indicates that your fudge is cooked to perfection.
Mixing and Cooling Methods: When it comes to achieving a smooth and creamy texture, pay attention to your stirring techniques. Stir the fudge mixture gently and consistently, making sure to scrape the sides of the saucepan to prevent any crystallization. This promotes even distribution of heat and ingredients, resulting in a luscious, velvety fudge. When it comes to cooling, opt for a gradual process. Allow the fudge to cool at room temperature before refrigerating it. This gradual cooling prevents rapid temperature changes that could affect the texture and consistency of your fudge.
Experimenting with Flavor and Texture
Once you’ve mastered the art of fudge fixing, it’s time to unleash your creativity and play around with different flavors and textures. Fudge serves as a fantastic canvas for various mix-ins and toppings that can take your fudge to new heights of deliciousness.
Consider incorporating crushed nuts, dried fruits, or chocolate chips into your fudge for added texture and bursts of flavor. You can also experiment with different extracts, such as peppermint or almond, to create unique taste profiles. Don’t forget about the power of toppings! Sprinkle sea salt, colorful sprinkles, or even a drizzle of caramel or melted chocolate over your fudge to add visual appeal and extra decadence.

Conclusion
Congratulations! You’ve journeyed from fudge fails to fabulous results. Armed with the knowledge of fudge-fixing techniques, you can now tackle any fudge mishaps that come your way. Remember the importance of temperature control, ingredient ratios, and proper mixing and cooling methods. Don’t be afraid to experiment and add your own personal touch to create fudge masterpieces that will leave everyone craving more.
So, the next time your fudge doesn’t turn out as planned, don’t despair. You now have the tools and expertise to fix it like a pro. Embrace the adventure of fudge-making, and let your creativity run wild. Get ready to impress your friends and family with perfect, velvety squares of fudge that will have them begging for your secret recipe. Happy fudge fixing!
Leave a Reply