 Welcome, gardening enthusiasts and eco-conscious individuals! Are you ready to embark on a rewarding journey that not only contributes to the health of your plants but also promotes sustainable living? Look no further than vermiculture! In this blog post, we will explore the world of vermiculture, a fascinating technique of composting with worms, and discover how it can revolutionize your gardening game while reducing food waste and promoting a healthier planet.
But first, let’s understand what exactly vermiculture is and why it holds such significance for soil health. Vermiculture, simply put, is the process of utilizing earthworms to bioconvert organic waste materials into nutrient-rich soil amendments. This technique goes beyond traditional composting by harnessing the power of these wriggly wonders to break down organic matter more efficiently and enhance soil biodiversity. By incorporating vermiculture into your gardening practices, you’re not only enriching your soil but also embracing sustainable agriculture and reducing your carbon footprint. It’s a win-win situation!
Understanding Vermiculture
Now that we have a basic understanding of vermiculture, let’s dive deeper into its benefits for soil health. Vermiculture brings about a plethora of advantages that will make your plants thrive like never before. Firstly, it improves soil structure by increasing porosity, allowing better air circulation and root penetration. This enhanced soil structure promotes healthier plant growth and nutrient absorption. Secondly, vermiculture stimulates microbial activity in the soil, as the earthworms’ digestive processes introduce beneficial microorganisms into the ecosystem. These microorganisms aid in breaking down organic matter further, releasing vital nutrients that plants require for optimal growth.
Moreover, vermiculture helps to reduce food waste by efficiently recycling kitchen scraps and other organic materials. Instead of sending these valuable resources to landfills, you can turn them into nutrient-rich worm castings, a natural and eco-friendly alternative to synthetic fertilizers. By embracing vermiculture, you’re not only nurturing your plants but also contributing to a more sustainable future by adopting organic waste management practices. So, let’s roll up our sleeves and get started with vermiculture!
Getting Started with Vermiculture
Now that you’re eager to embark on your vermiculture journey, let’s discuss the initial steps to set up your vermicomposting system. The first thing to consider is selecting the right location. Choose a spot that provides a moderate temperature range and is protected from extreme weather conditions. A shady area in your backyard or a well-ventilated corner of your garage can be ideal.
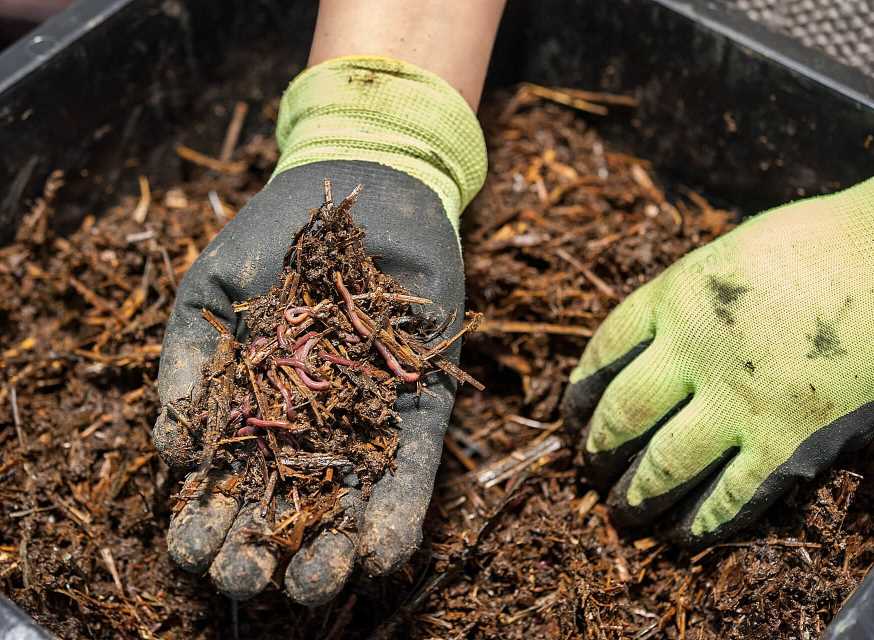
Next, it’s important to choose the appropriate worm species for your vermiculture bed. Red wigglers (Eisenia fetida) and European nightcrawlers (Eisenia hortensis) are popular choices due to their efficient composting capabilities. These worms thrive in organic waste environments and are readily available from local suppliers or online sources. Once you have your worms, it’s time to create the vermiculture bed.
Constructing the vermiculture bed is a simple process. Gather materials such as a sturdy container or a worm bin, shredded newspaper or cardboard for bedding, and a small amount of garden soil. Line the container with the bedding material, moisten it slightly, and mix in the garden soil. This creates a comfortable habitat for the worms to thrive in. Remember to keep the bedding moist, but not soggy, as worms require a moist environment to breathe through their skin.
Acquiring Worms
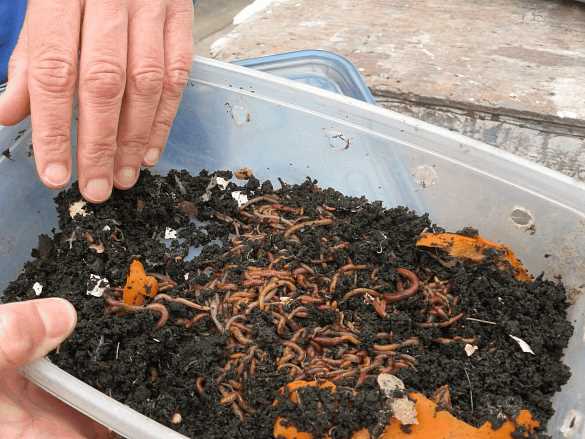
Now that your vermiculture bed is ready, it’s time to introduce the stars of the show – the worms! You can obtain worms from various sources. Local garden centers, online worm suppliers, or even fellow vermicomposters in your community are great places to start your search. Choose healthy worms that are active and wriggling, indicating their vitality.
When handling and transporting the worms, it’s important to provide them with a comfortable environment. Keep them in a dark, breathable container, preferably with some of the bedding material from their original habitat. Avoid exposing them to direct sunlight or extreme temperature fluctuations during transportation. Remember, happy worms mean a thriving vermiculture system!
Maintaining a Healthy Vermiculture System
Now that your vermiculture system is up and running, it’s important to maintain its health and ensure the well-being of your wriggly companions. One key aspect is feeding the worms with the right food. They thrive on a balanced diet of organic waste materials such as fruit and vegetable scraps, coffee grounds, tea leaves, and crushed eggshells. Avoid feeding them citrus fruits, onions, garlic, and oily or greasy food, as these can be harmful to the worms.
Properly feeding the worms involves burying the food waste in the bedding material. Create a small hole, add the food scraps, and cover them with a layer of bedding. This helps to control odor and prevents pests from being attracted to the vermicompost. Remember to feed the worms in moderation, adjusting the amount based on their consumption rate. Overfeeding can lead to excess moisture and unpleasant odors in the bin.
In addition to feeding, it’s crucial to monitor the temperature and moisture levels in the vermiculture system. Worms thrive in temperatures ranging from 55°F to 77°F (13°C to 25°C). If the temperature rises above or falls below this range, consider adjusting the location or insulating the bin to maintain optimal conditions. Moisture levels should be kept around 70%, providing enough moisture for the worms without saturating the bedding. Sprinkle water on the bedding as needed to maintain the desired moisture level.
To manage odor and pest control, prevent unpleasant smells by burying food waste properly and ensuring good ventilation in the system. Avoid overmoistening the bedding, as this can lead to anaerobic conditions and foul odors. If you encounter common pests such as fruit flies or mites, you can address them by adjusting the moisture level, burying the food waste more effectively, or adding a layer of newspaper on top of the bedding to discourage pests.
Harvesting and Utilizing Vermicompost
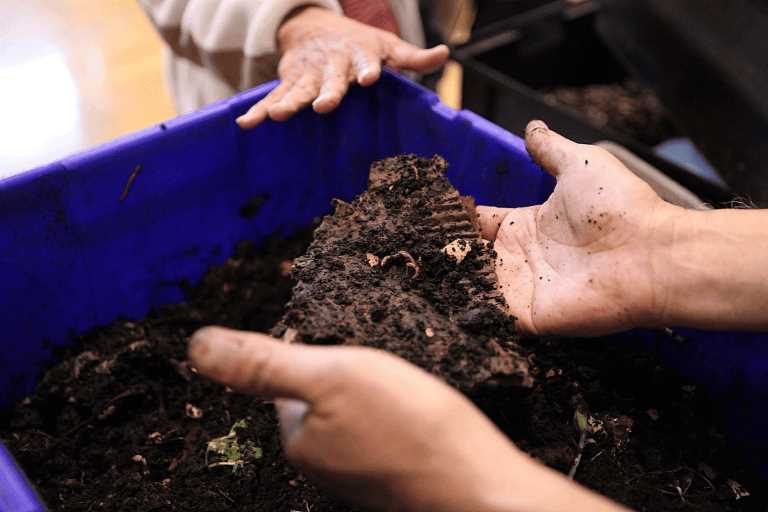
After a few months of diligent care and patience, your vermicompost will be ready for harvesting. Signs of mature vermicompost include a dark, crumbly texture, earthy smell, and the absence of recognizable food scraps. To harvest the vermicompost, there are a couple of methods you can choose from.
One method is the “separation” method, where you create a pile of vermicompost on one side of the bin and add fresh bedding and food scraps to the other side. Gradually, the worms will migrate to the side with fresh food, allowing you to scoop out the vermicompost from the other side. Another method is to dump the contents of the bin onto a tarp or large tray and manually separate the worms from the vermicompost by hand. This requires a bit more effort but ensures a thorough separation.
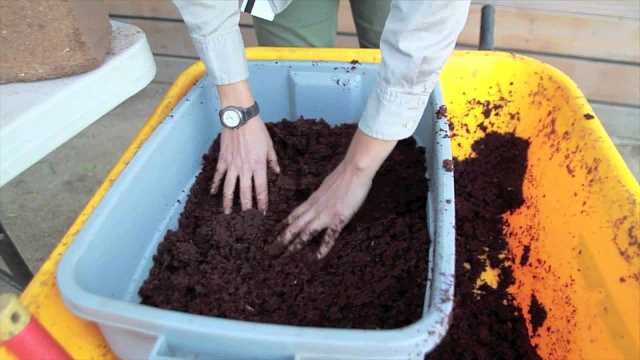
Once you have harvested the vermicompost, it’s time to prepare it for use in your garden. You can mix it into potting soil for container plants, incorporate it into garden beds to improve soil fertility, or create a nutrient-rich vermicompost tea by steeping vermicompost in water and using it as a natural liquid fertilizer. The possibilities are endless, and your plants will thank you for the boost of nutrients!
Troubleshooting and Common Challenges
As with any gardening endeavor, vermiculture may present some challenges along the way. It’s important to be able to identify and address common issues to ensure the success of your vermiculture system. One common challenge is related to worm health problems. If you notice a decline in worm population or activity, it could be a sign of improper feeding, extreme temperatures, or unfavorable moisture levels. Adjusting these factors and providing a healthy environment will help restore the well-being of your worms.
Environmental challenges can also arise, such as excessive moisture, foul odors, or pest infestations. These issues can usually be mitigated by adjusting the moisture level, burying food waste properly, and ensuring good ventilation. Regularly monitoring and maintaining the vermiculture system will help prevent these challenges from becoming major setbacks.
To ensure long-term success and maintenance of your vermiculture system, here are some tips: establish a regular maintenance routine, such as feeding the worms and monitoring temperature and moisture levels; observe and learn from your worms’ behavior and adjust the conditions accordingly; and stay proactive in troubleshooting any issues that may arise. With a little patience, care, and problem-solving, your vermiculture journey will be a rewarding and sustainable endeavor.
Conclusion
Congratulations on taking the first steps toward starting your own vermiculture system! By embracing vermiculture, you are not only contributing to the health of your soil and plants but also practicing sustainable and eco-friendly gardening methods. Vermiculture offers a host of benefits, from improving soil structure and nutrient availability to reducing food waste and promoting sustainable agriculture practices.
Remember, starting small and gradually expanding your vermiculture system is key. As you gain experience and witness the transformation of organic waste into nutrient-rich vermicompost, you’ll be inspired to continue your journey towards a greener and more sustainable lifestyle. So, gather your materials, select the right worm species, create a cozy vermiculture bed, and watch as nature’s little helpers work their magic. Happy vermiculture adventures!
Leave a Reply