 Are you ready to take your knitting skills to the next level? If so, it’s time to delve into the world of purl stitch increases! Mastering the purl stitch is a key milestone for any knitting enthusiast, and learning how to increase in this stitch opens up a whole new realm of possibilities. In this article, we’ll explore the importance of increasing in the purl stitch, the benefits it brings to your knitting projects, and guide you through the process step by step. So grab your knitting needles and let’s get started on this exciting journey!
Before we dive into the nitty-gritty of purl stitch increases, let’s quickly recap the significance of mastering the purl stitch itself. The purl stitch is one of the fundamental building blocks of knitting, alongside the knit stitch. It creates a smooth and textured surface on your fabric, making it perfect for creating intricate patterns and designs. Once you have a solid grasp of the purl stitch, you’ll be amazed at the range of techniques and patterns you can accomplish. And that’s where increasing in the purl stitch comes in!
Understanding the Purl Stitch
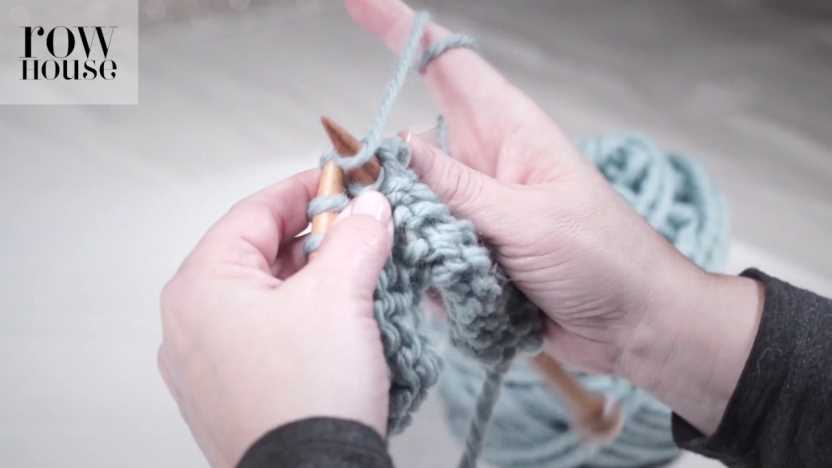
Before we delve into the world of purl stitch increases, let’s make sure we have a clear understanding of the basic purl stitch itself. The purl stitch is the reverse of the knit stitch, and it’s created by inserting your needle from right to left into the front of the stitch on the left needle, wrapping the yarn counterclockwise around the right needle, and pulling the loop through the stitch. It’s like a little magic trick that adds texture and dimension to your knitting!
The purl stitch is incredibly versatile and finds its place in a wide range of knitting applications. It’s commonly used for creating ribbing, seed stitch, garter stitch, and intricate cable patterns. By mastering the purl stitch, you gain the power to bring various knitting designs to life. However, it’s important to maintain consistent tension while working the purl stitch to ensure an even and professional-looking fabric. Practice makes perfect, so don’t be discouraged if it takes a few tries to get your tension just right. Keep at it, and you’ll soon find your knitting rhythm!
Why Increase in Purl Stitch?
Now that we’ve covered the basics of the purl stitch, let’s explore why increasing in this stitch can take your knitting projects to a whole new level. When you increase in purl stitch, you’re adding extra stitches to your work, which opens up a world of design possibilities. By strategically increasing in purl stitch, you can create beautifully textured fabrics, add shaping to your garments, and bring more depth and dimension to your knitting.
Imagine a cozy sweater with an intricate lace panel that gradually widens as you move up the body. This effect is achieved by skillfully increasing in purl stitch. It adds an elegant touch and showcases your knitting craftsmanship. Whether you’re working on scarves, blankets, or even socks, increasing in purl stitch can make your projects stand out from the crowd. It’s an advanced technique that will elevate your knitting skills to new heights and leave you with stunning finished pieces that you’ll be proud to show off.
To give you a taste of the design possibilities, let’s explore a few knitting patterns that utilize increased purl stitches. You can create a lovely diamond motif by increasing purl stitches at regular intervals, or experiment with shaping by increasing in purl stitch along the sides of a sweater to create a flattering silhouette. The beauty of increasing in purl stitch is that it adds both visual interest and functional elements to your knitting, allowing you to customize your projects to your heart’s content.
How to Increase in Purl Stitch
Now that you’re excited about the potential of increasing in purl stitch, let’s walk through the step-by-step process of achieving this technique. Here’s a handy guide to get you started:
- Set up your work and identify the stitch to increase: Before you begin, make sure you’re familiar with your pattern and where the increases should be placed. Take a moment to identify the stitch where the increase will happen, and keep an eye on it as you work.
- Choose the appropriate increase method for purl stitch: There are several methods you can use to increase in purl stitch. The most common ones include the yarn-over increase, the make-one increase, and the lifted increase. Each method creates a slightly different effect, so choose the one that suits your project and desired outcome.
- Perform the selected increase technique: Once you’ve chosen your preferred method, follow the instructions carefully to execute the increase. It might involve wrapping the yarn differently, picking up stitches, or working with multiple needles. Take your time, refer to tutorials or knitting guides if needed, and practice the technique until you feel comfortable with it.
Remember, consistency and neatness are key when increasing in purl stitch. Pay attention to your tension, ensuring that your stitches are even and well-formed. Keep practicing the technique, and with time and experience, you’ll develop a knack for creating flawless increased purl stitches.
While you’re on your journey to mastering purl stitch increases, it’s essential to be aware of common mistakes to avoid. One frequent error is accidentally twisting the stitch during the increase, which can lead to an uneven fabric. Be mindful of your needle placement and the direction of your yarn wraps to prevent any twisting mishaps. Additionally, take care not to pull the yarn too tightly when working the increased stitch, as it can result in a tight and puckered section. Practice patience and find a rhythm that allows you to maintain a consistent tension throughout your project.
Advanced Techniques and Variations
Once you’ve mastered the basic purl stitch increase, it’s time to explore more advanced techniques and variations. Here are a few options to expand your repertoire:
- Yarn-over increase in purl stitch: The yarn-over increase creates an eyelet effect and is often used in lace knitting. In a purl stitch, you’ll bring the yarn to the front of the work before wrapping it around the needle and completing the stitch.
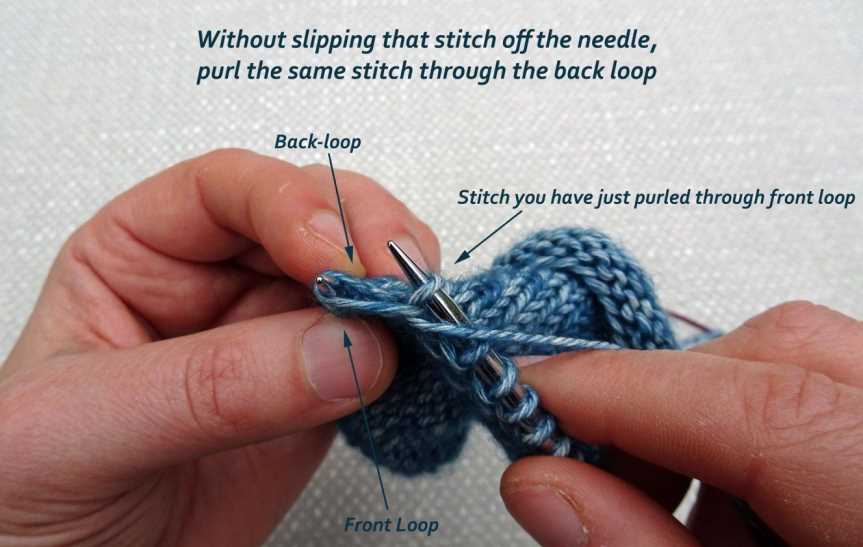
- Make-one increase in purl stitch: The make-one increase is a versatile method that adds a stitch without leaving a noticeable gap. It involves picking up the bar between stitches and purling into it, creating a new stitch.
- Lifted increase in purl stitch: The lifted increase involves lifting the strand between stitches onto the left needle and then purling into it, effectively creating a new stitch.
These advanced techniques allow you to play with different textures and stitch patterns, adding even more depth and complexity to your knitting. You can incorporate these increased purl stitches into various projects, such as intricate lace shawls, cozy cabled sweaters, or elegant accessories. Let your creativity run wild as you explore the limitless possibilities of increased purl stitch designs.

Troubleshooting and Practice
As with any new skill, it’s normal to encounter challenges along the way. Don’t be discouraged if you make mistakes or run into difficulties when increasing in purl stitch. The key is to identify and address common errors as they arise. If you notice uneven tension, practice maintaining a consistent rhythm and tension throughout your work. If your stitches are twisted, double-check your needle placement and yarn wraps to ensure they’re correct.
To gain confidence and refine your skills, it’s helpful to practice the techniques through sample swatches or small projects. Create a dedicated practice piece where you can experiment with different increase methods and stitch patterns. This hands-on approach allows you to become comfortable with the techniques and make adjustments as needed. Additionally, don’t hesitate to seek additional resources, such as knitting books, online tutorials, or joining a local knitting group, where you can learn from experienced knitters and exchange tips and tricks.
Conclusion
Congratulations on taking the initiative to boost your knitting abilities by learning how to increase in the purl stitch! By mastering this technique, you’ll unlock a whole new world of knitting possibilities. Increased purl stitches add texture, shape, and complexity to your projects, allowing you to create unique and eye-catching designs. Remember to maintain tension, choose the right increase method for your project, and practice regularly to refine your skills.
As you continue your knitting journey, don’t limit yourself to just the purl stitch. Keep exploring new techniques and challenging yourself with advanced patterns. Embrace the joy and fulfillment that comes with knitting, and let your creativity shine through your projects. With dedication and practice, you’ll become a skilled knitter, confidently incorporating increased purl stitches and other techniques into your future creations. Happy knitting!
Leave a Reply