 When it comes to furniture design, innovation is the key to creating unique and exciting pieces that enhance our daily lives. Today, we’re going to dive into the world of DIY furniture projects and explore the fascinating realm of motorized bar stools. Imagine having a bar stool that not only offers comfortable seating but also incorporates automation to make it even more fun and convenient. In this article, we’ll guide you through the process of building your very own motorized bar stool, bringing together creativity, engineering, and a touch of DIY magic.
Understanding the Motorized Bar Stool
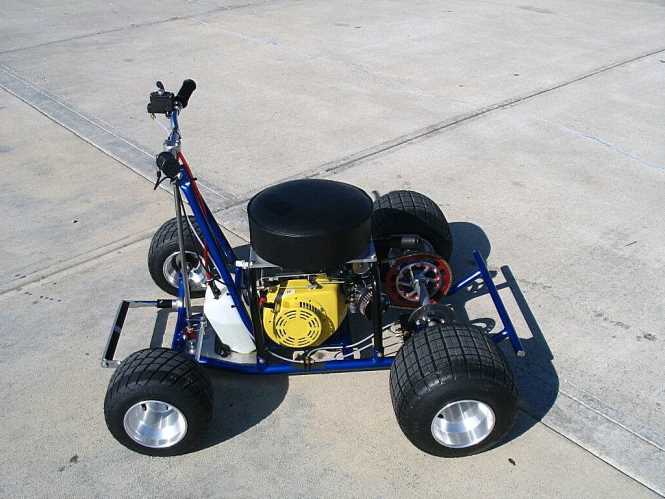
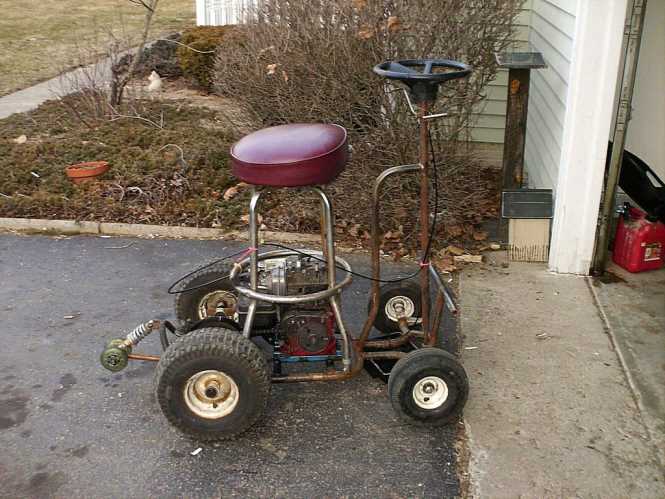
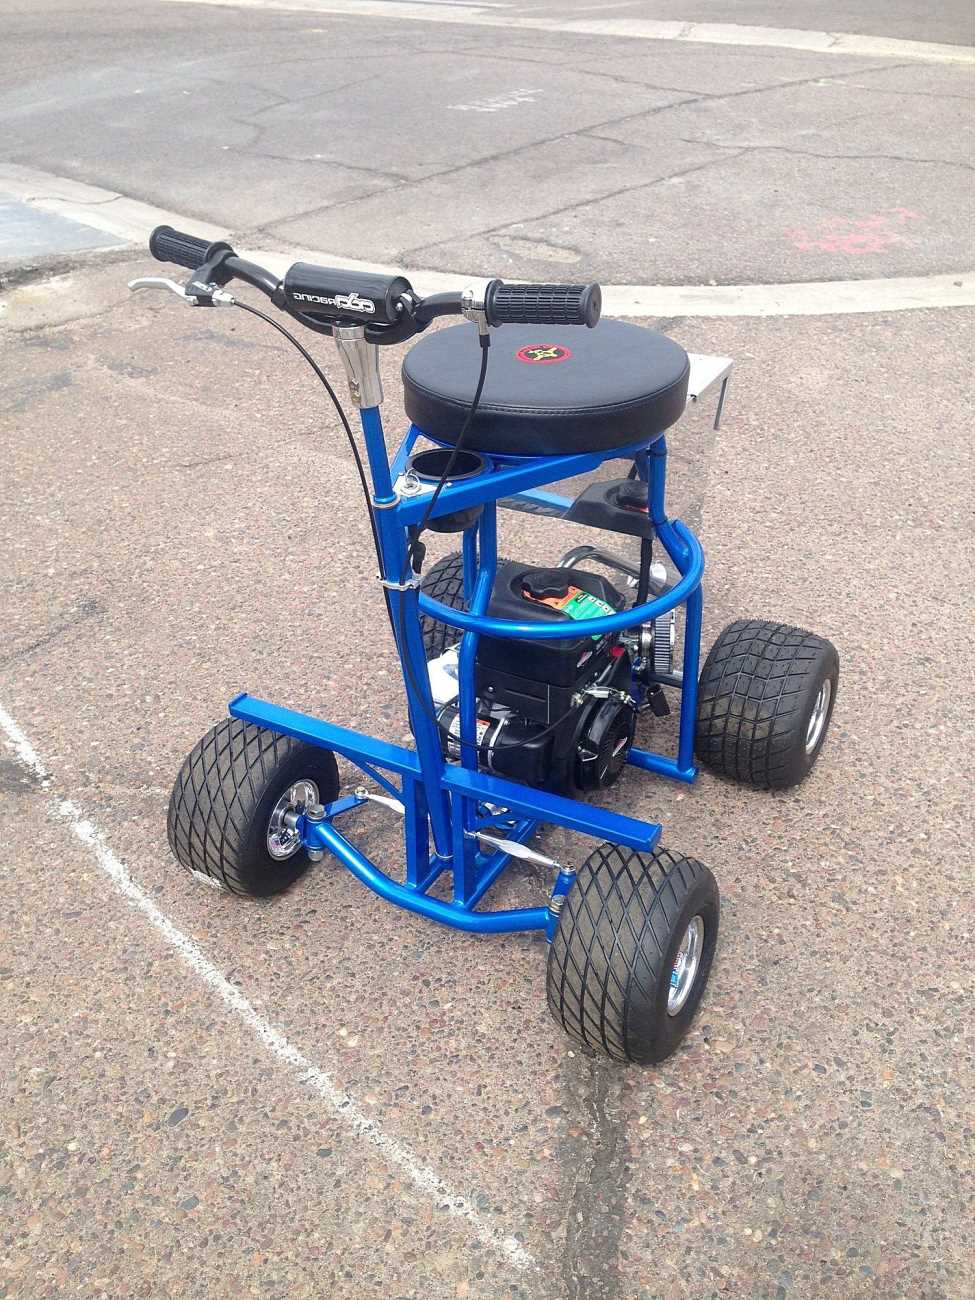
Before we start building, let’s familiarize ourselves with the concept of a motorized bar stool. A motorized bar stool is a seating solution that incorporates electric-powered features, making it stand out from traditional bar stools. It combines the comfort and style of a regular stool with the excitement and innovation of automation. With a motorized bar stool, you can adjust the height, swivel effortlessly, and even enjoy a gentle rocking motion. It’s a chair that brings a whole new level of convenience and entertainment to your home or establishment.
One of the key benefits of a motorized bar stool is its versatility. Whether you’re looking to add a unique touch to your home bar, impress guests at parties, or create an eye-catching feature for your café, a motorized bar stool is sure to grab everyone’s attention. Plus, it’s not just about the wow factor – these stools offer practical advantages too. Adjusting the height and swivel functionality allows for easy access and movement, making them suitable for people of different heights and those with mobility limitations. However, as with any motorized equipment, safety is paramount, and we’ll discuss important considerations later on.
Gathering the Necessary Tools and Materials
Before we embark on this exciting DIY journey, let’s make sure we have all the tools and materials we need. Here’s a list to get you started:
- Electric drill
- Saw (circular or jigsaw)
- Screwdriver set
- Wrench set
- Measuring tape
- Sandpaper (various grits)
- Paintbrushes
Now that we have our tools ready, it’s time to source the materials. You’ll need:
- Wood (preferably hardwood) for the base, seat, and footrest
- Steel or metal rods for reinforcement
- Motor and electrical components (motor, battery, wiring, switches, connectors)
- Paint, stain, or finish for the final touches
When sourcing materials, consider your budget. You can find affordable options that still offer great quality. It’s all about striking a balance between cost and durability.
Planning and Designing Your Motorized Bar Stool
Now that we have our tools and materials ready, it’s time to unleash your creativity and start planning the design of your motorized bar stool. Consider the dimensions and specifications that will best suit your needs. Will it be a single-seater or have multiple seats? How high should the stool be? Take measurements and sketch out your ideas to create a blueprint.
While you’re designing, don’t forget about ergonomics and comfort. Think about the angle of the seat, the backrest, and the footrest. You want your bar stool to provide a comfortable seating experience for extended periods. After all, it’s not just about functionality; it’s about creating a cozy and enjoyable space.
Building the Base Structure
With the design in hand, let’s dive into the construction phase. Start by following a step-by-step guide to construct the base of your motorized bar stool. This will provide stability and support for the entire structure. Reinforce the base with steel or metal rods to ensure durability.
Next, it’s time to install the motor and electrical components. Carefully follow the manufacturer’s instructions to ensure proper installation and alignment. Connect the motor to the power source using the appropriate wiring and connectors. Safety is crucial here, so double-check all connections and test the electrical system for functionality before proceeding.
Fabricating the Seating and Footrest
The seating and footrest are where comfort and style come together. Choose the right materials that not only match your design vision but also provide comfort. Hardwood is a popular choice for its durability and aesthetic appeal.
Using your saw and other tools, cut, shape, and assemble the seating components. Make sure everything fits together snugly and securely. Attach the footrest at the desired height and ensure proper alignment with the seating area. The footrest should provide a comfortable place for your feet to rest while sitting on the stool.
Wiring and Power System Installation
The electrical system is the heart of your motorized bar stool. Select the appropriate wiring and connectors based on the power requirements of your motor. Ensure that all connections are secure and well-insulated.
Connect the motor to the power source according to the manufacturer’s instructions. It’s important to follow electrical safety guidelines during this process. Once everything is connected, give it a test run to ensure the motor and electrical components are functioning correctly. Safety first!
Adding Finishing Touches
Now that your motorized bar stool is taking shape, it’s time to add those final touches that will make it truly unique. Sand the surfaces to smooth out any rough edges or imperfections. This will ensure a comfortable seating experience.
Apply paint, stain, or finish to enhance the appearance of your bar stool. Choose colors and finishes that complement your overall design scheme. This is where you can let your personality shine and add a pop of color or a touch of elegance.
If you’re feeling extra creative, consider adding decorative elements to personalize your bar stool further. You could add patterns, decals, or even upholstery to make it truly one-of-a-kind. The possibilities are endless!
Safety Precautions and Maintenance
As with any piece of furniture, safety is a top priority. Ensure that the base structure is stable and capable of supporting the weight it will bear. Perform regular maintenance and inspections to keep the motorized components in good working order. Check for any signs of wear and tear, loose connections, or potential safety issues. Address any concerns promptly to ensure the continued safe operation of your motorized bar stool.
Additionally, it’s important to familiarize yourself with proper usage guidelines. Communicate any safety precautions to those who will be using the motorized bar stool. Encourage responsible use and discourage any reckless behavior that could compromise safety.
If you encounter any issues or need troubleshooting tips, refer to the manufacturer’s instructions or seek assistance from experts in the field. It’s always better to be safe than sorry!
Conclusion
Congratulations! You’ve taken a seat on innovation by building your very own motorized bar stool. Throughout this journey, you’ve learned about the importance of innovation in furniture design and discovered the exciting world of DIY furniture projects. By incorporating automation into your seating solution, you’ve created a piece that not only offers comfort but also brings a touch of excitement to your space.
Embrace the spirit of innovation and continue exploring further possibilities. Who knows what other creative seating solutions or DIY home automation projects you could venture into? The world of furniture design is full of opportunities to bring your unique ideas to life.
So go ahead, take a seat on innovation, and let your imagination run wild. Build, create, and make your mark on the world of furniture design. The possibilities are endless, and the satisfaction of crafting your own innovative piece of furniture is truly priceless.
Leave a Reply